***R&D Thread: Aluminum 1 Piece Cap'd Valve Body

Collapse
X
 
  • Time
  • Show
Clear All
new posts
  • TimmyJay
    I came to play...not talk
    • May 2007
    • 779

    #1

    ***R&D Thread: Aluminum 1 Piece Cap'd Valve Body

    Here it is again...Valve only discussion please!

    Feel free to add your thoughts. I think it should be based on the following design but 1 piece. If you are interested and have some money to burn then let me know and we will start a list. If not feel free to add your positive thoughts and constructive criticism.

    This would basically be a valve body with the following:
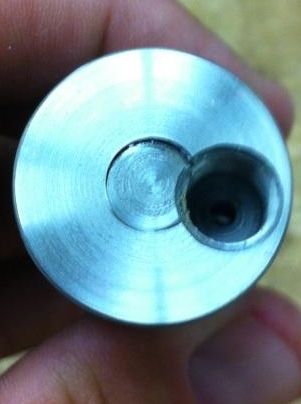
    (Classic style) Theaded front dump chamber
    On/Off hole
    Fieldstrip hole
    1-3? - female NPTs (2 side & 1 rear)
    BUILT IN CAP


    The other option is a cap that originally cost me $35...


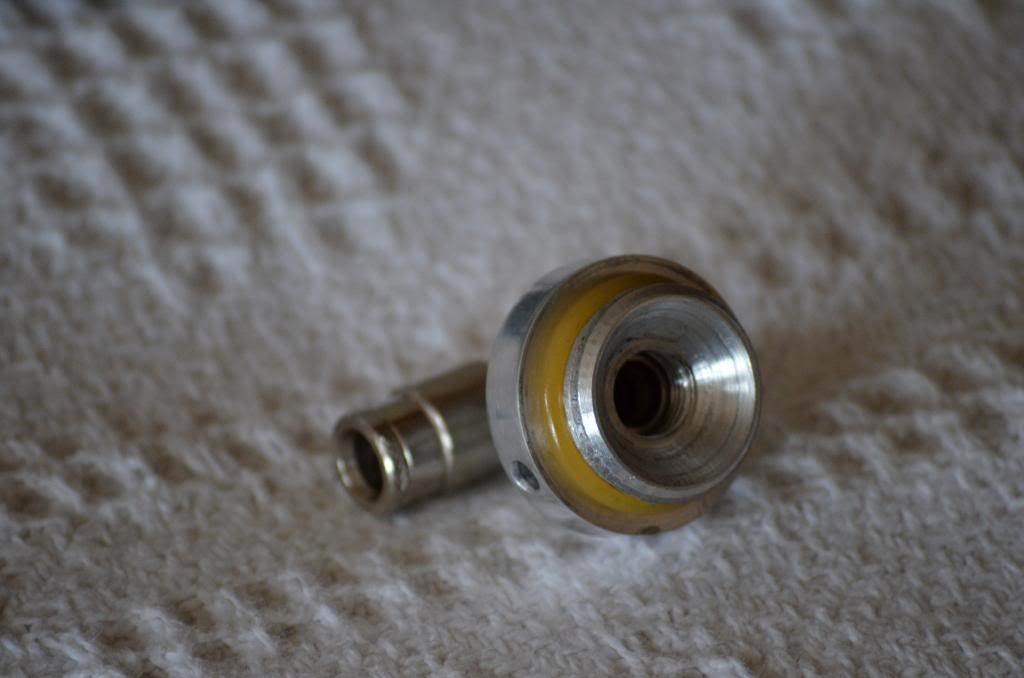
    This was from when I tried to do what I coined as the Hacked Valve mod...it needed more attention to detail as it had pin hole leaks.

    Last edited by TimmyJay; 03-23-2013, 04:06 PM.
  • knownothingmags
    RKM 3D Designs

    • Apr 2010
    • 4810

    #2
    i think you could kill the back thinkness of the valve if it is a one peice, the area where the cap screws in would be enough to hold the preasure, if we are talking one peice.
    logoRKM 3D Designs

    Comment

    • dboggs79
      Registered User
      • Jun 2010
      • 467

      #3
      Ive been wanting to do this myself for years. Then a few years ago I saw Deus' thread on the caps and thought it would have taken off shortly after. My opinion, it wouldn't be hard to make this function with a solid valve. In other words, no cap. Just a new valve machined without the threads for the regulator. My, thoughts since have mostly been on cleanliness. If done like the original design, there has to be a passage drilled to get the air to the top of the on/off. Not a hard task to tackle, but then you would have to put a plug of some sort on the rear of the valve. Not, the clean look I would want. My thought was to instead drill that channel from the inside of the dump chamber and plug it there. Ive not taken the time to remove the power tube on any of my classic valves. So, im not positive that this is feasible. Until myself, or someone else does so and takes some measurements I'll remain hopeful at least.

      Comment

      • koleah
        Registered User
        • Jul 2005
        • 797

        #4
        Is there a picture from the other side?

        Comment

        • blackdeath1k
          Registered User
          • Jan 2002
          • 2436

          #5
          As I've made clear in the other thread. I'm all for a front half that is as minimalist as possible. Basically just the dump chamber. On off. And a npt. Just waiting on his final design and price. Then it will be a matter of my funds at the time this comes up to order. Or preorder as I would assume it to be. But also as stated. If this will be an actual capped stock style just made out of al I'm out totally from the get go.

          Comment

          • Cokrkilr
            Registered User
            • Jan 2013
            • 377

            #6
            I said it twice in the other thread and I guess ill say it here too, how are you going to mill the ports for the on off with a one piece design? Its done from the back of the valve.

            You cant go in from the front or you'll have a pretty good leak, can't go in from the inlet air because its not high enough or even close to being in line. It has to come from the back... open up a valve and peek around at it, you'll see.

            Edit, Also, the only feasible way, is how agd already has it set up, with a small cap on the back... think about it.... the air comes in from the side, it goes backwards into the valve, then forward through the on off... even if you found a way to connect the on off port for air, how would you get air to it? The ports for the charge air and on off don't line up, unless they've made some new flexible drill bit I'm unaware of to drill a 90* hole half way in the valve.
            Last edited by Cokrkilr; 03-23-2013, 04:37 AM.

            Comment

            • OPBN
              OldPBNoob

              • Sep 2008
              • 5240

              #7
              I'm actually good with three npt inlets. 2 side and one rear. Rear would be useful if anyone used it for a pump with 12gs as it would alllow for a rear facing gauge. Drilling from the dump chamber might be an idea as well, it could be plugged and loctited. Could make the rear hole optional.
              Last edited by OPBN; 03-23-2013, 09:19 AM.
              My AO Feedback

              Comment

              • blackdeath1k
                Registered User
                • Jan 2002
                • 2436

                #8
                Originally posted by OPBN
                I'm actually good with three npt inlets. 2 side and one rear. Rear would be useful if anyone used it for a pump with 12gs as it would alllow for a rear facing gauge. Drilling from the dump chamber might be an idea as well, it could be plugged and loctited. Could make the rear hole optional.

                I would say make sure the on/off is milled to accept a ULT.
                You beat me to it. Drill it all from the dump. Then put a set screw in the one hole. Its not that big of a deal.

                Comment

                • dboggs79
                  Registered User
                  • Jun 2010
                  • 467

                  #9
                  Originally posted by Cokrkilr
                  I said it twice in the other thread and I guess ill say it here too, how are you going to mill the ports for the on off with a one piece design? Its done from the back of the valve.

                  You cant go in from the front or you'll have a pretty good leak, can't go in from the inlet air because its not high enough or even close to being in line. It has to come from the back... open up a valve and peek around at it, you'll see.

                  Edit, Also, the only feasible way, is how agd already has it set up, with a small cap on the back... think about it.... the air comes in from the side, it goes backwards into the valve, then forward through the on off... even if you found a way to connect the on off port for air, how would you get air to it? The ports for the charge air and on off don't line up, unless they've made some new flexible drill bit I'm unaware of to drill a 90* hole half way in the valve.
                  If AGD has already done it the only way it will work, why have this discussion. My thought is to drill the hole above the on/off from the inside of the dump chamber and then plug the end of it that connects the dump chamber. Then, when drilling the hole for the field strip screw, drill it deep enough to connect with the previous mentioned hole. After that is done the small inlet hole, even in its stock location, will interconnect with the passage above the field strip screw and into the passage leading above the on/off. Another plug would need to be used above the field strip screw. I did, after my previous post, take some measurements and put together a simple drawing on paper. It can be done! Is it the easiest or most efficient manner? Maybe not. But as I mentioned before, I would like something that when finished looks clean and not like a modified part. Doing it this way would allow for the rear portion of the valve to have some additional milling to make it look, in my opinion, a little more refined. Again, its not impossible. Open up a valve and take a peek, you'll see.
                  Last edited by dboggs79; 03-23-2013, 07:44 AM.

                  Comment

                  • TimmyJay
                    I came to play...not talk
                    • May 2007
                    • 779

                    #10
                    This is good stuff up here

                    I was also thinking of a new design of a valve with an intergrated body. It would allow for different setups like the Xmag and the MM09. Open your mind here or I will probably lose you......

                    What if you took the concept of the carbon fiber mod and had seperated the body at the feed neck? Mill the new valve with the rear part of the body all as 1 piece. You would need to use the classic powertube style with internal threading (I think). Then you could mill different fronts like Warp left/right and standard feed. You could also make the fronts with a built in freak barrel back as one piece. Then your freak tip would be the only thing you need to screw on.

                    Last edited by TimmyJay; 03-23-2013, 01:55 PM.

                    Comment

                    • OPBN
                      OldPBNoob

                      • Sep 2008
                      • 5240

                      #11
                      Originally posted by Cokrkilr
                      I said it twice in the other thread and I guess ill say it here too, how are you going to mill the ports for the on off with a one piece design? Its done from the back of the valve.

                      Edit, Also, the only feasible way, is how agd already has it set up, with a small cap on the back... think about it.... the air comes in from the side, it goes backwards into the valve, then forward through the on off... even if you found a way to connect the on off port for air, how would you get air to it?
                      If I am understanding the valve function correctly, the only reason the air passage goes from the inlet to the back is to get regulated. If we are talking about a valve body strictly to be used with an external reg, which we are here, there is no need for the air to go back to the reg area, it can go straight to the on/off. This is why I posed the "t" channel. With three inputs, two on either side, one rear.
                      My AO Feedback

                      Comment

                      • Cokrkilr
                        Registered User
                        • Jan 2013
                        • 377

                        #12
                        Originally posted by dboggs79
                        If AGD has already done it the only way it will work, why have this discussion. My thought is to drill the hole above the on/off from the inside of the dump chamber and then plug the end of it that connects the dump chamber. Then, when drilling the hole for the field strip screw, drill it deep enough to connect with the previous mentioned hole. After that is done the small inlet hole, even in its stock location, will interconnect with the passage above the field strip screw and into the passage leading above the on/off. Another plug would need to be used above the field strip screw. I did, after my previous post, take some measurements and put together a simple drawing on paper. It can be done! Is it the easiest or most efficient manner? Maybe not. But as I mentioned before, I would like something that when finished looks clean and not like a modified part. Doing it this way would allow for the rear portion of the valve to have some additional milling to make it look, in my opinion, a little more refined. Again, its not impossible. Open up a valve and take a peek, you'll see.

                        A) Feasible, most logical way, way that makes sense... that's what I said, not only way.

                        B) you don't need to rub "open up a valve, you'll see" in my face, I'm sure you and I had been the only two not blinded by aluminum in this project and actually thought of this problem... I'm literally saying for others to open it up and learn something, look at the air ports.

                        Your idea is the smartest one so far.

                        Comment

                        • Cokrkilr
                          Registered User
                          • Jan 2013
                          • 377

                          #13
                          Originally posted by OPBN
                          If I am understanding the valve function correctly, the only reason the air passage goes from the inlet to the back is to get regulated. If we are talking about a valve body strictly to be used with an external reg, which we are here, there is no need for the air to go back to the reg area, it can go straight to the on/off. This is why I posed the "t" channel. With three inputs, two on either side, one rear.

                          I get that, but your 1/8npt hole is half way up the valve, the on off hole is above all of that, did you even look at the valve as suggested? Nope

                          Comment

                          • TimmyJay
                            I came to play...not talk
                            • May 2007
                            • 779

                            #14
                            Why does everything have to lead to ********? This is R&D so everyone will have different opinoins.

                            Lets just brainwrite ideas and design what works. I have worked with XMT on a few custom projects now. I know he can do damn near anything for a mag if he has the time, basic design, and is provided funds.

                            I don't think any of us have all the answers. It just needs to be done right the first time.

                            Comment

                            • OPBN
                              OldPBNoob

                              • Sep 2008
                              • 5240

                              #15
                              Originally posted by Cokrkilr
                              I get that, but your 1/8npt hole is half way up the valve, the on off hole is above all of that, did you even look at the valve as suggested? Nope
                              Why are you so combative? We're all trying to work through this. I made a mistake. I did retake a look at the valve, and I did have my air passages confused. Its amazing how often you can take something apart and mess around with it only to realize its different than you remember.

                              Edit: yeah, that made no sense the more I thought through it.
                              Last edited by OPBN; 03-23-2013, 09:54 AM.
                              My AO Feedback

                              Comment

                              Working...