Results 1 to 26 of 26

Thread: The unfinished monster....

  1. #1
    Join Date
    Mar 2006
    Location
    610 PA
    Posts
    559

    The unfinished monster....

    Well I sat down and went through some of my gear. I have two hoppers that I don't use...I like them but for different reasons. They have endearing - and disappointing - qualities about them.

    Ricochet Rhino -
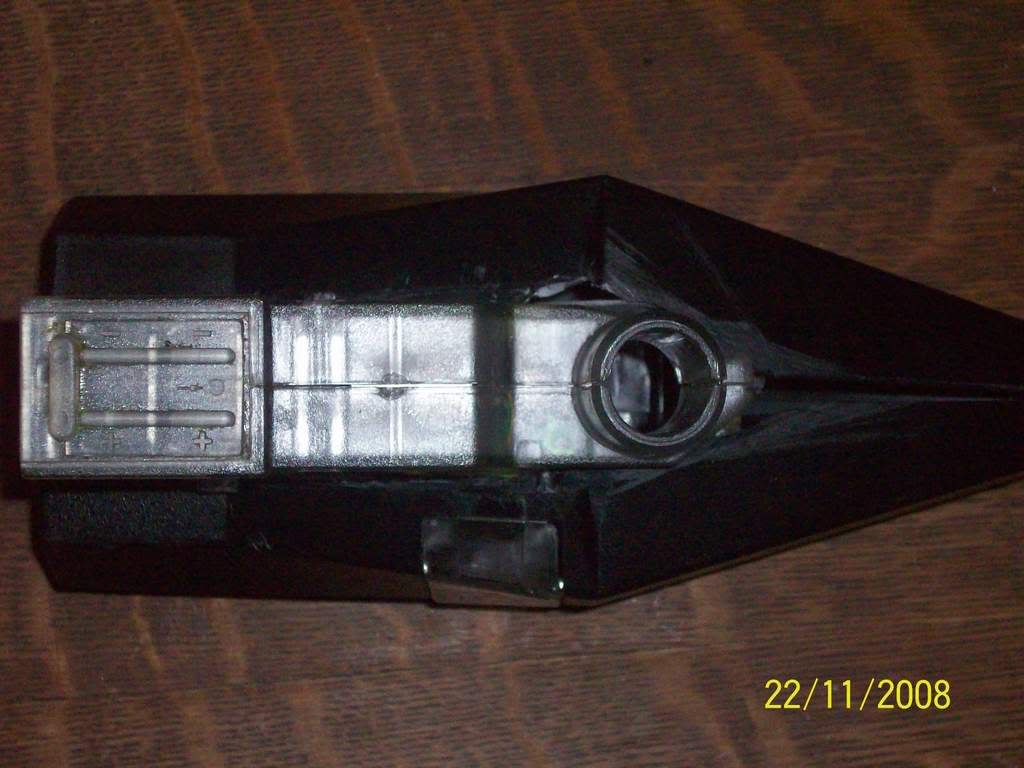
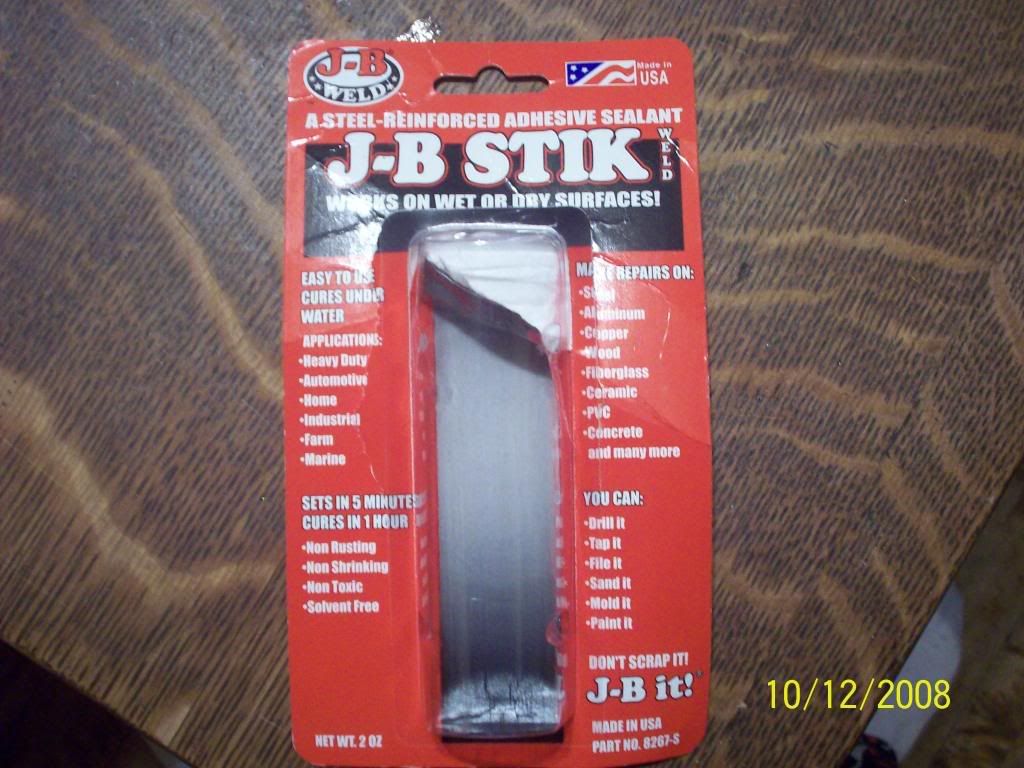
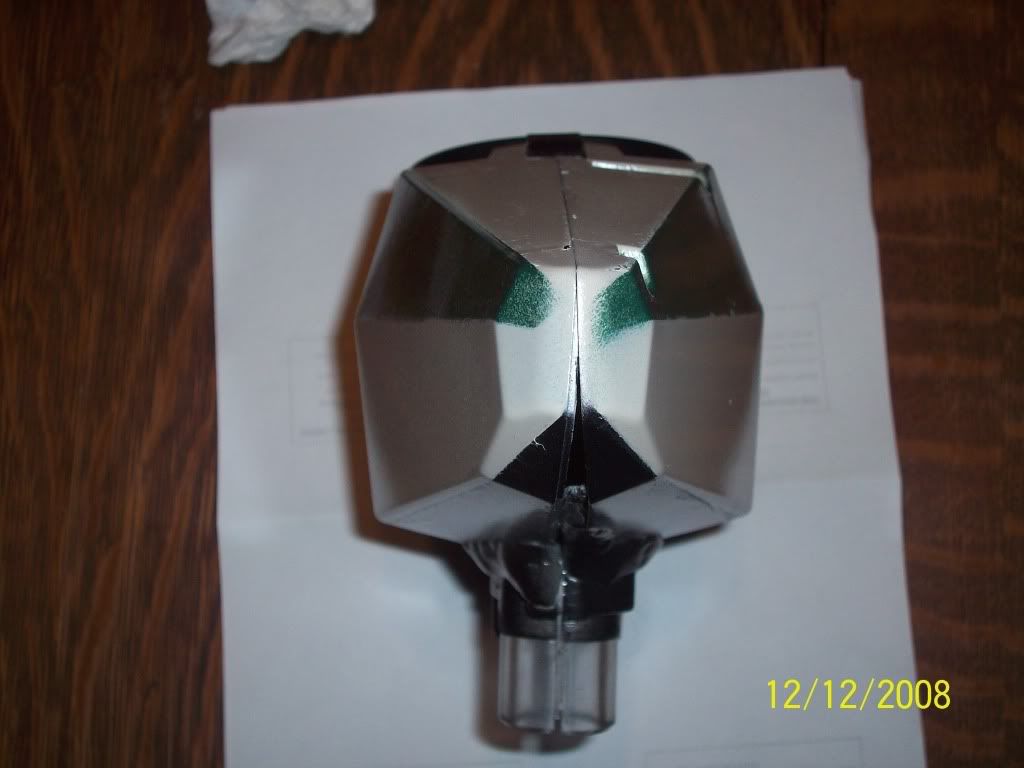
    Pros - Has excellent shell design. The facets make the loader harder to see, inspire deflection (have seen it personally) and shells can take some abuse. It has a window on the inside (left side) to see your paint level.
    Cons - Has "constant spin technology." For those of you that don't know what that means, it means you turn it on and it stays on....and spins alllllll dayyyyyyyyy loooooooooooooooong and doesn't stop until the battery is dead or you turn it off. It also only uses one 9V battery and has a SLOW feed rate. That's ok for mech markers unless you are fast-fingered.

    12V VL Revolution -
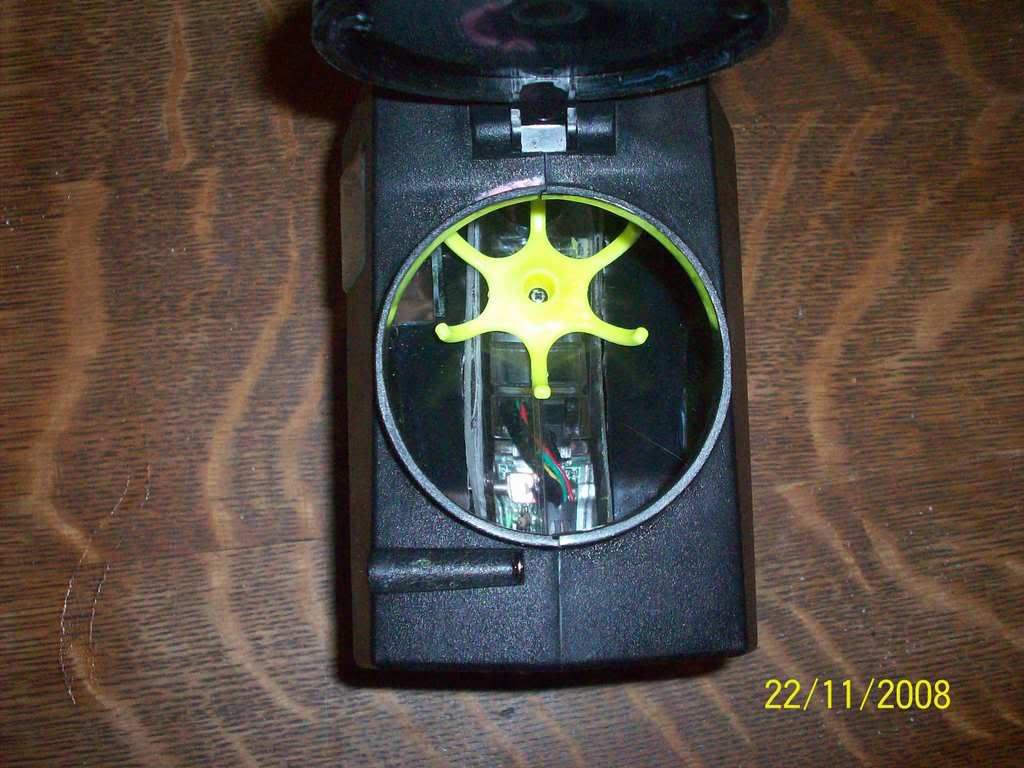
    Pros - It is 12V providing even and constant feeding. It has eyes in the feedneck and spins when a paintball drops. This makes for it only having to spin when it doesn't 'see' a ball in the neck. Battery life is very good.
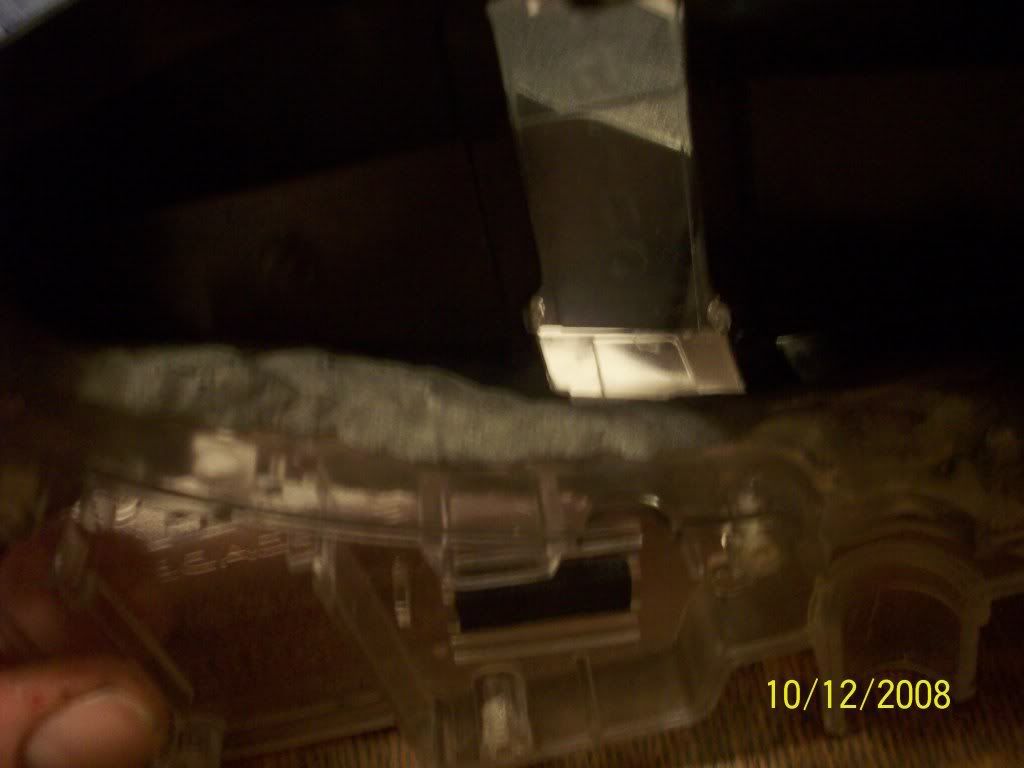
    Cons - This is a newer model, having newer shells. They shatter like glass when hit. They are also "clear" and I just don't like them.

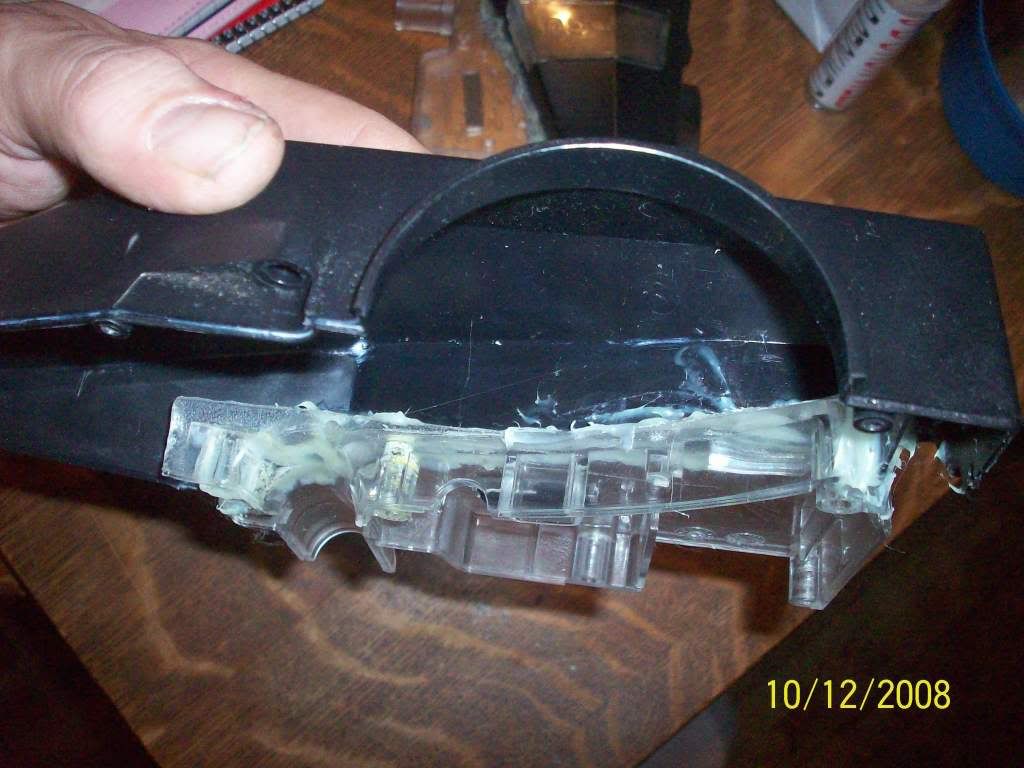
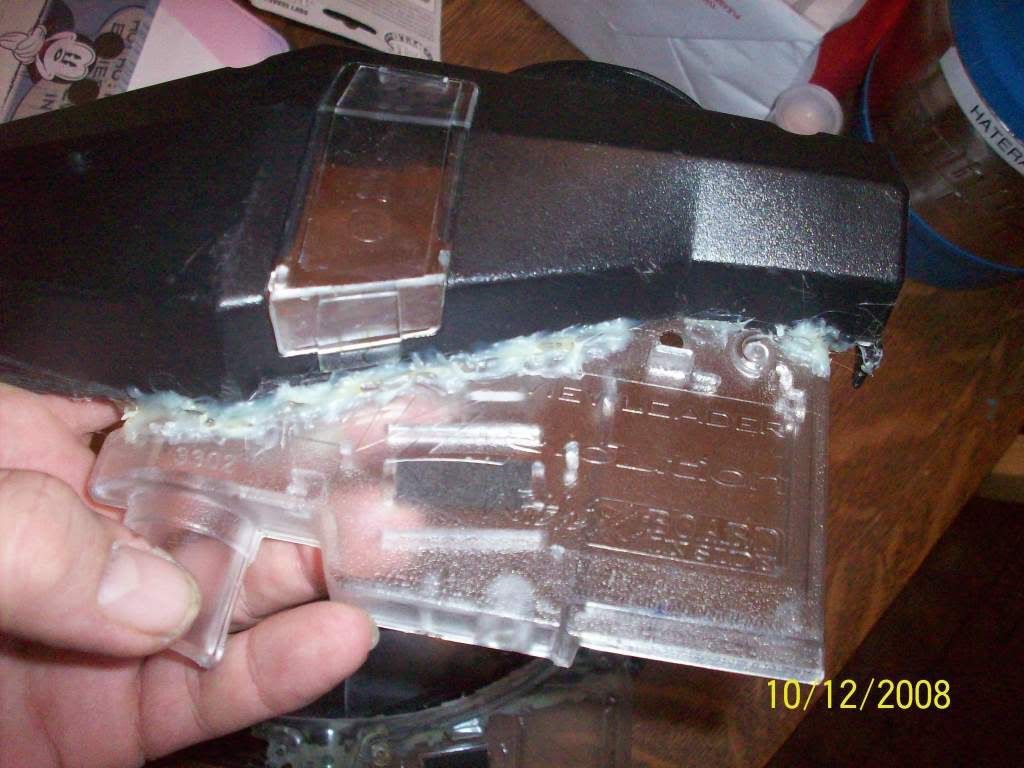
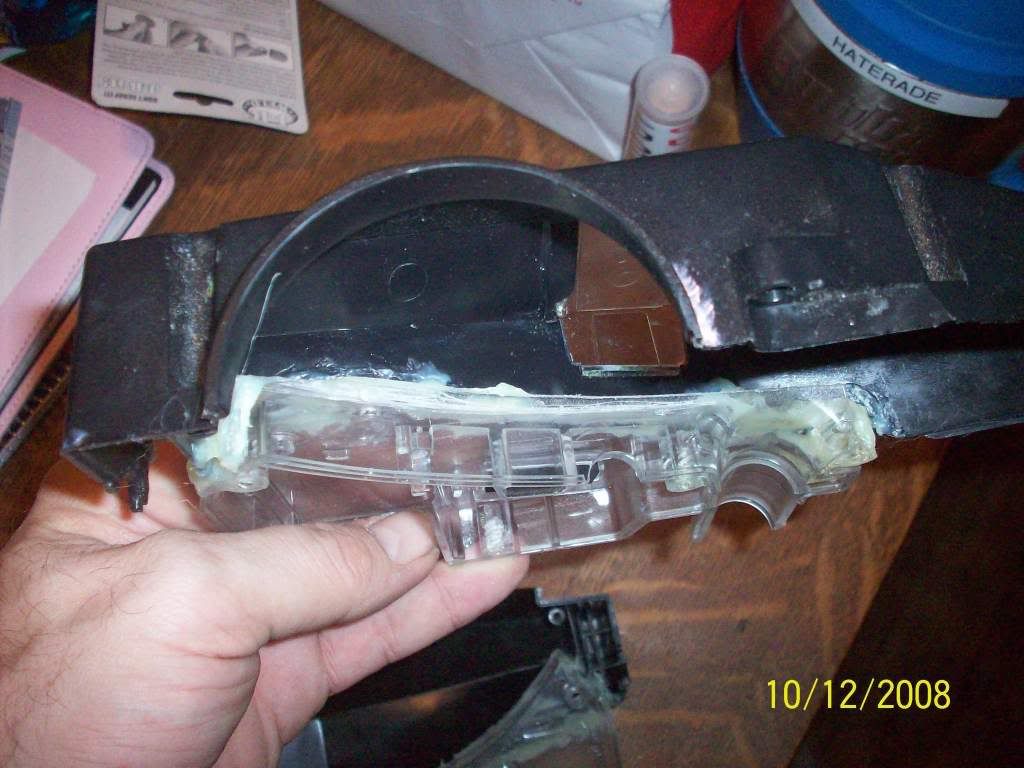
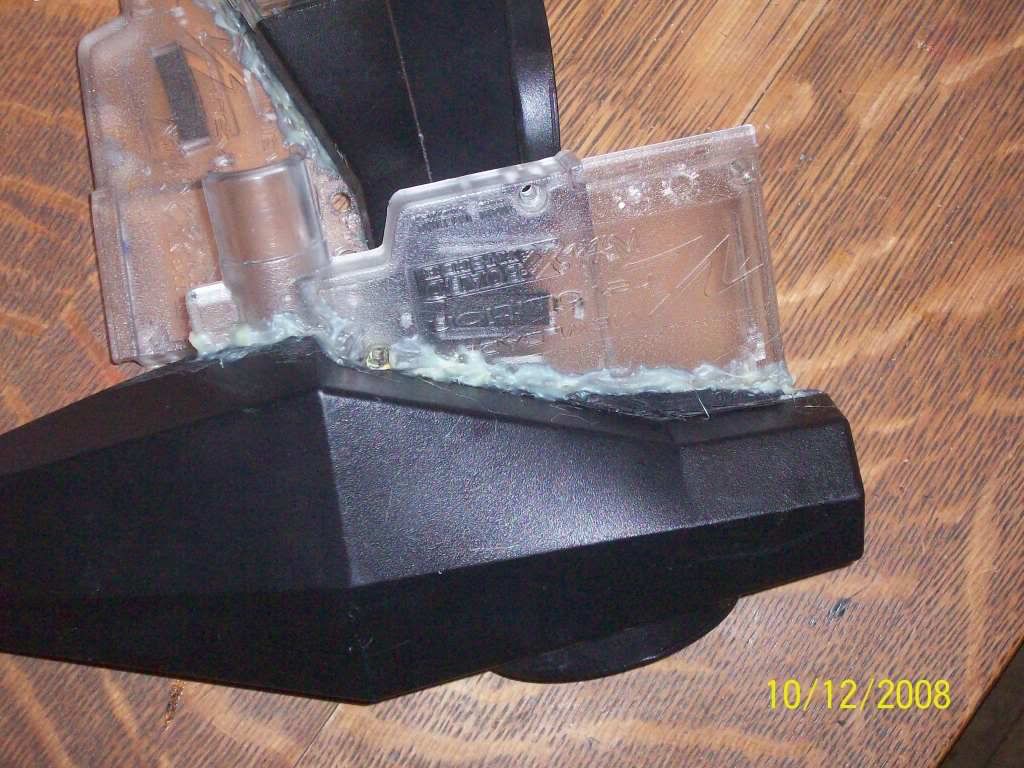
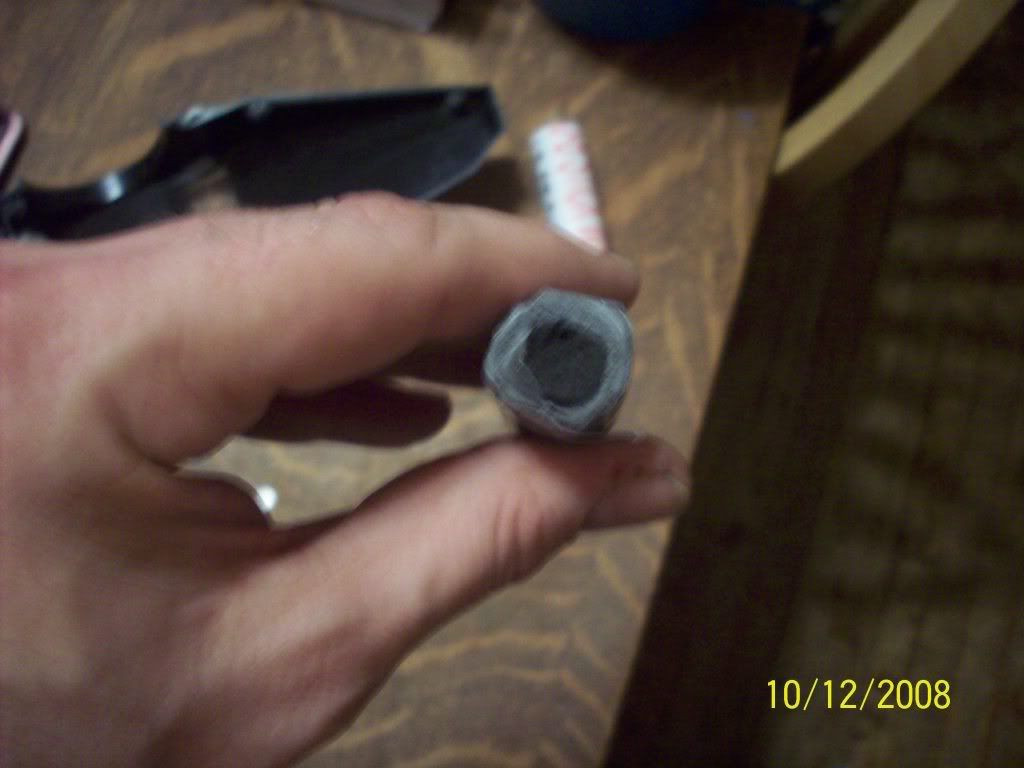
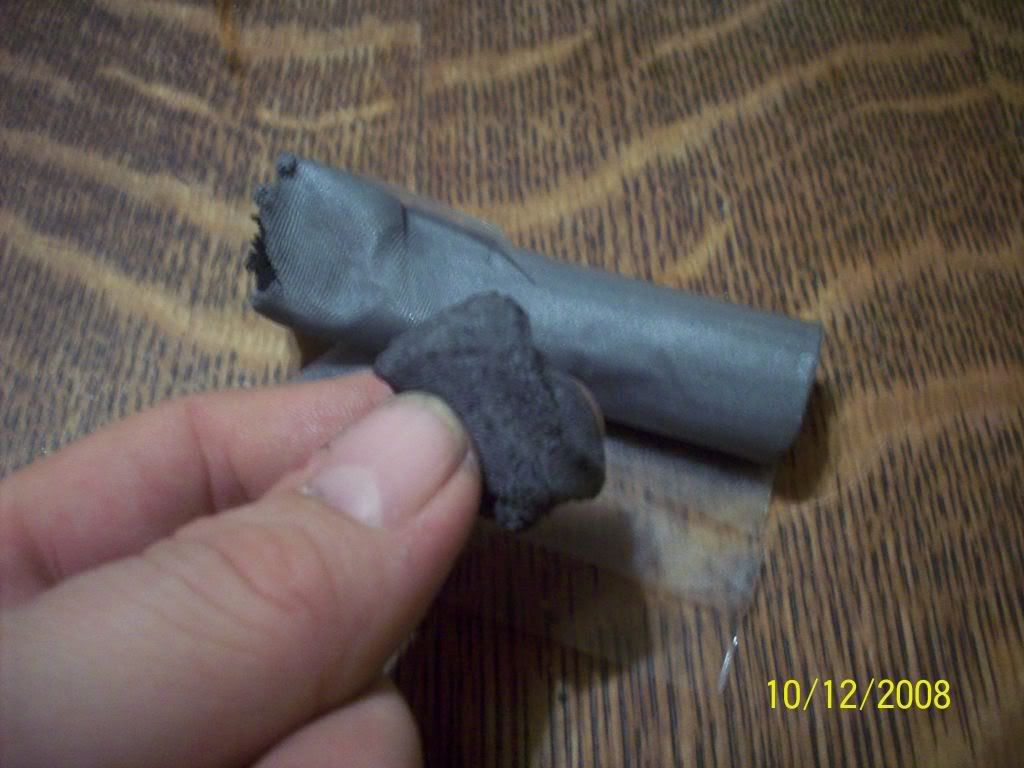
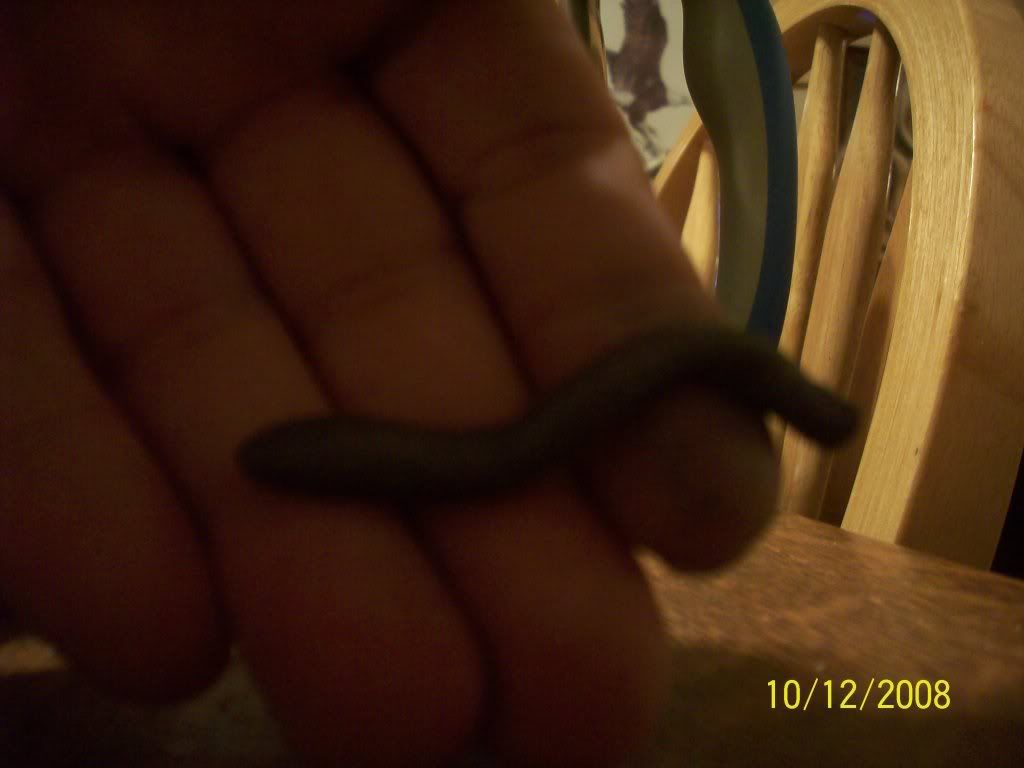
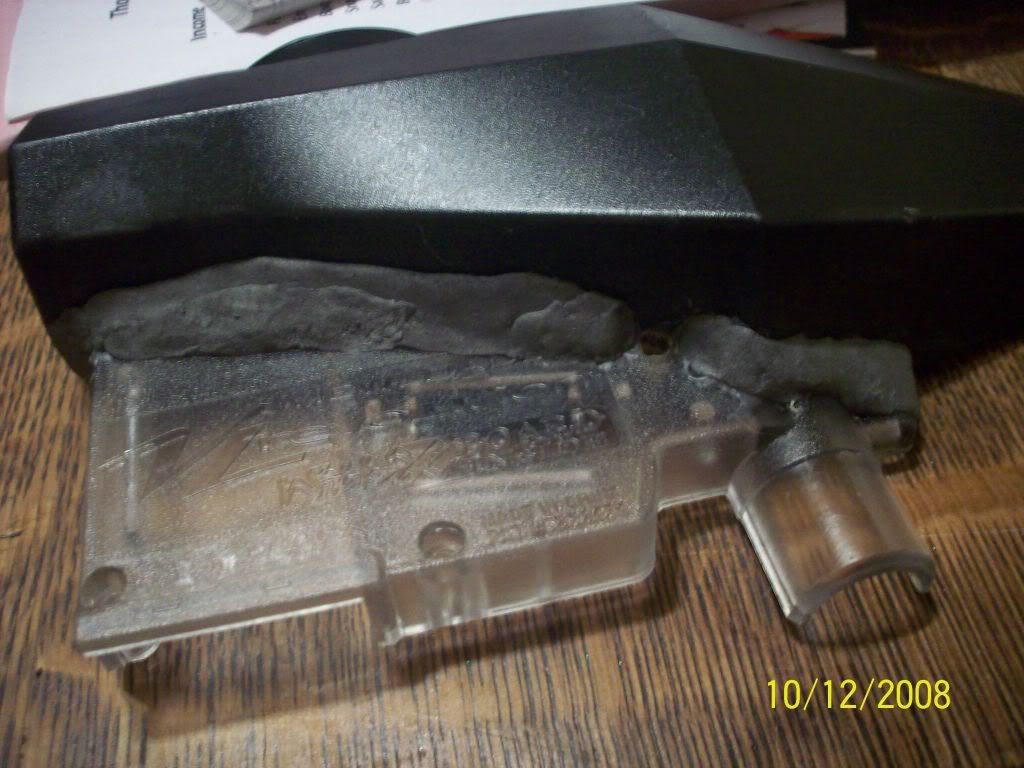
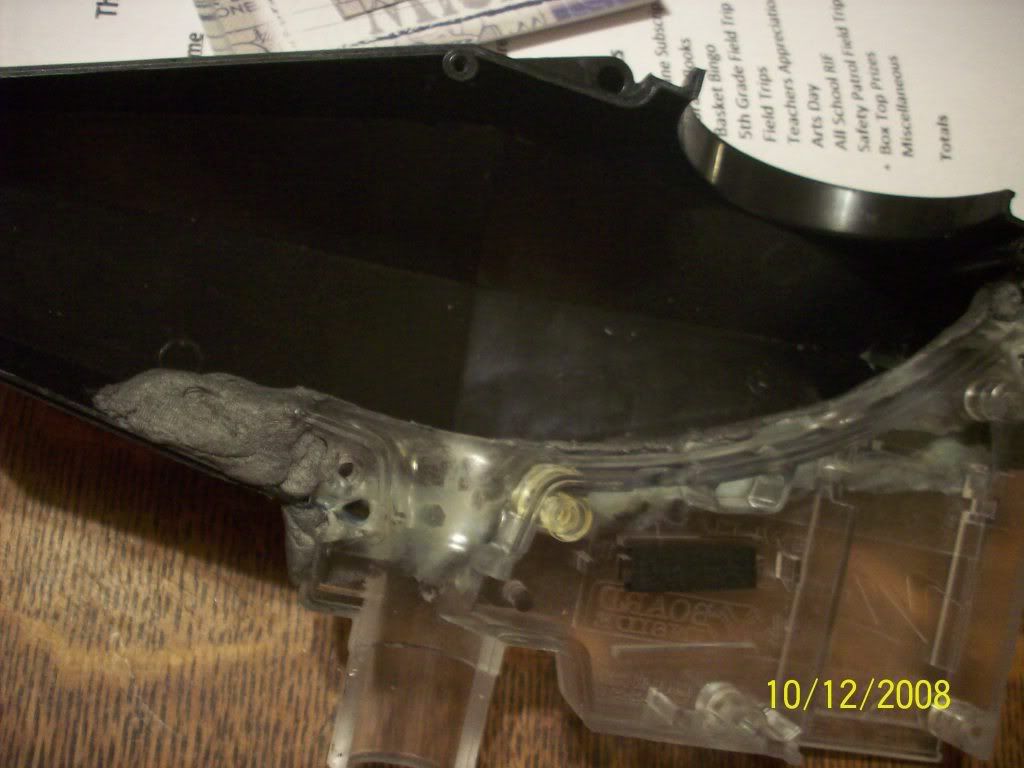
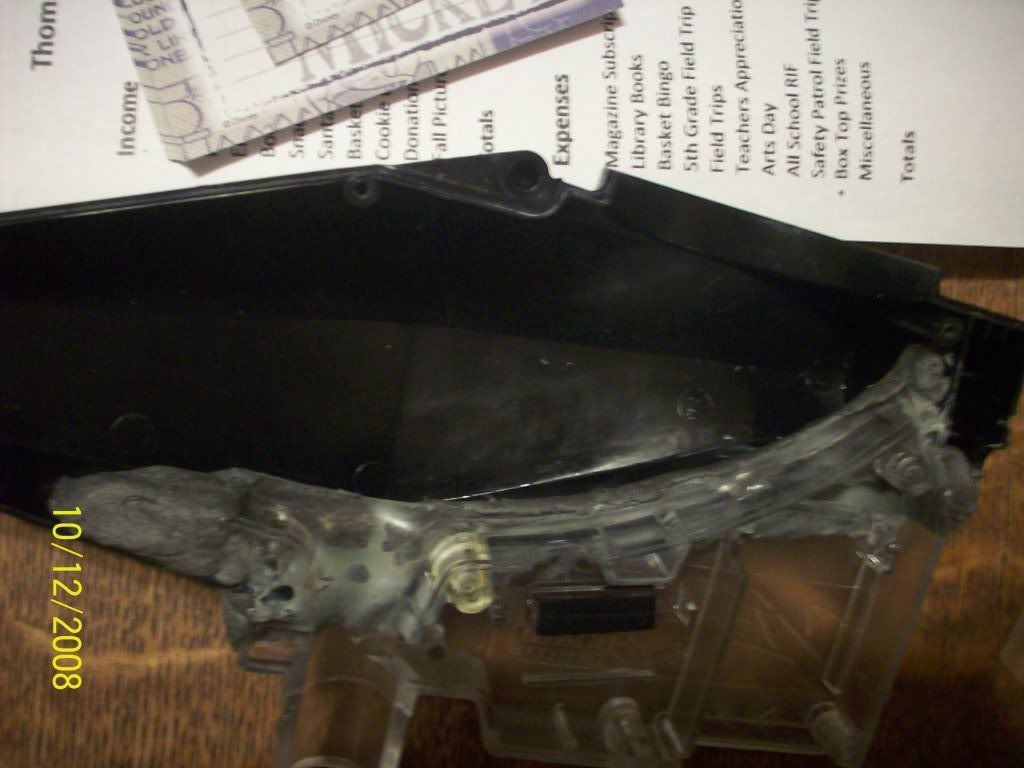
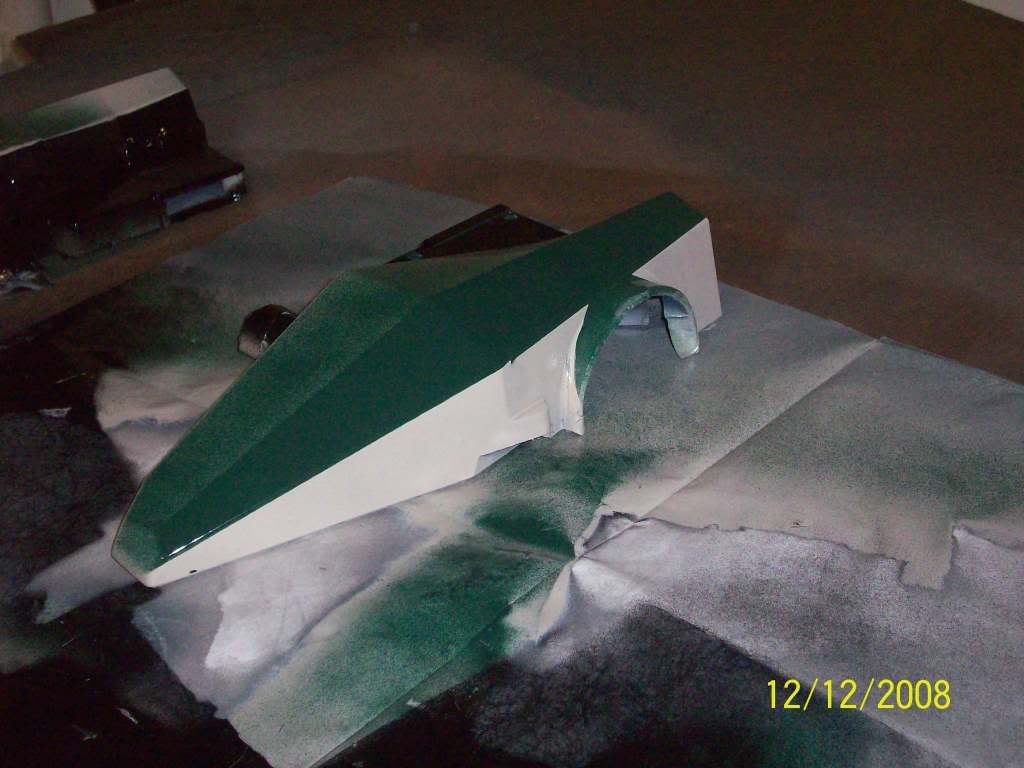
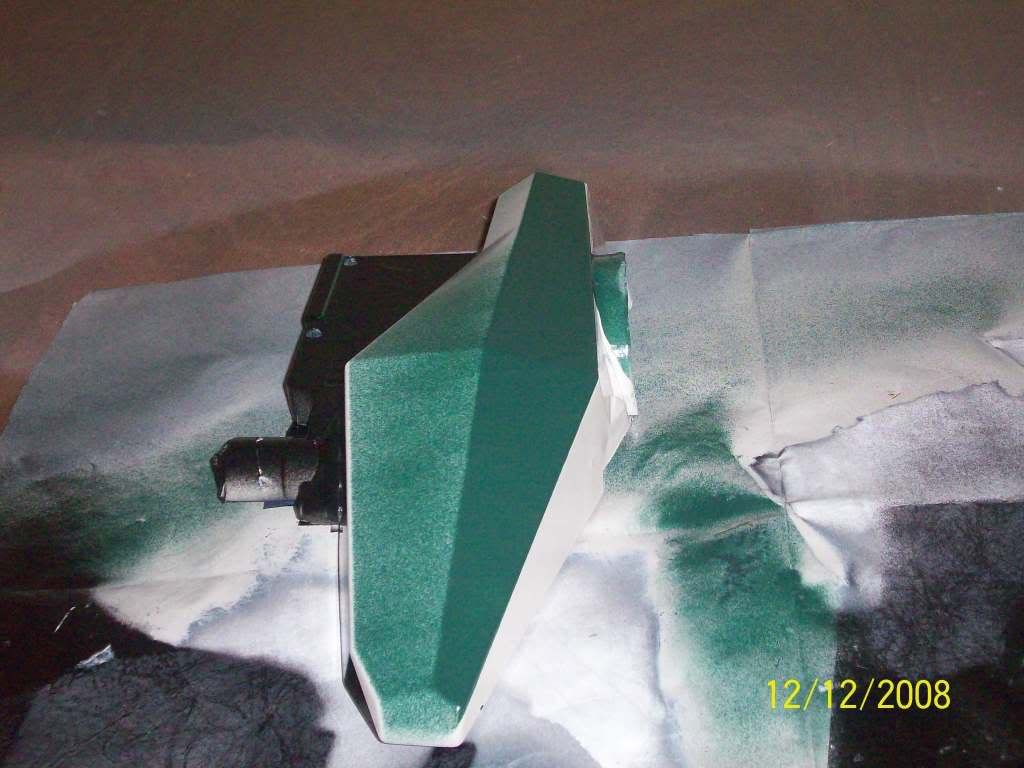
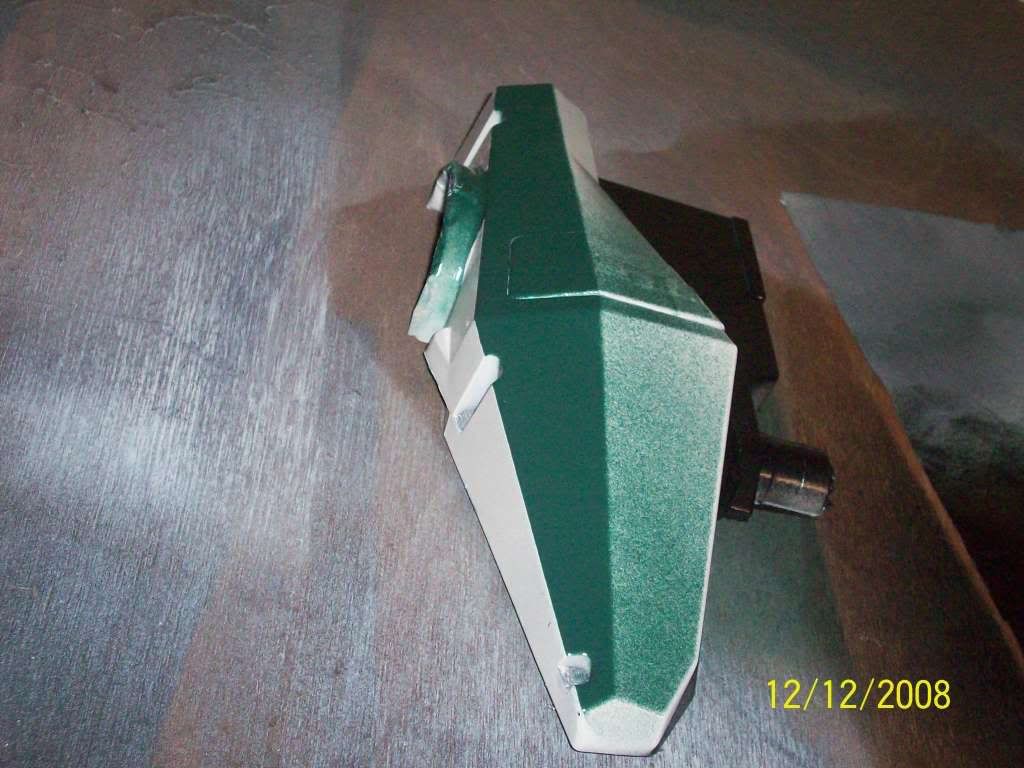
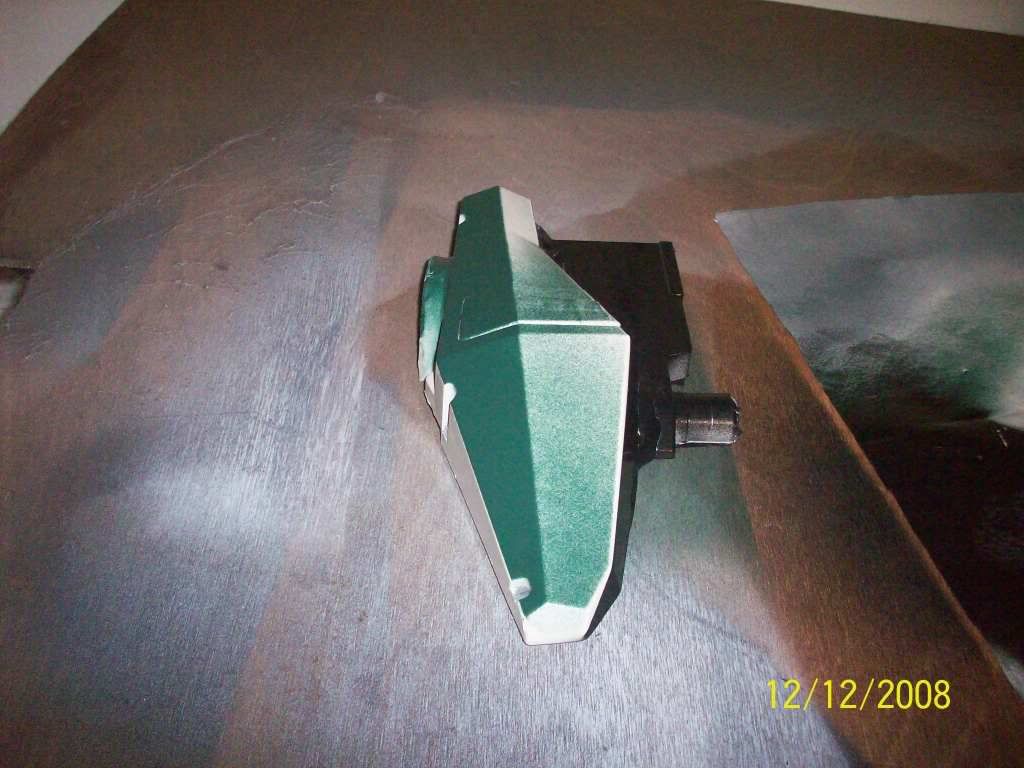
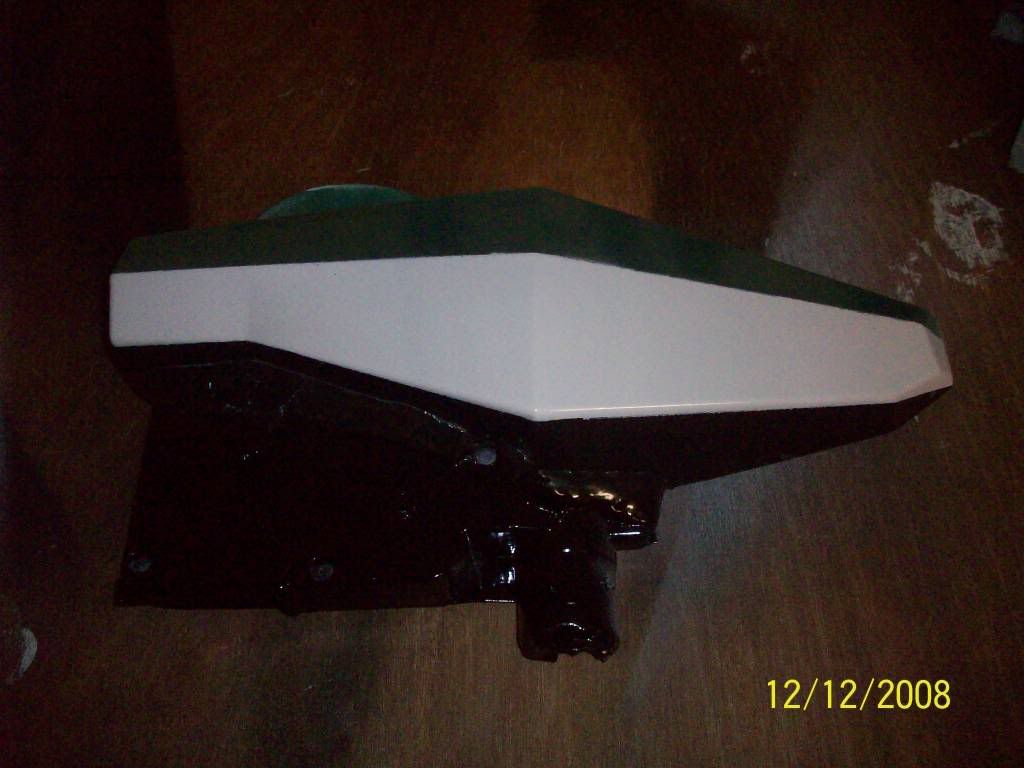
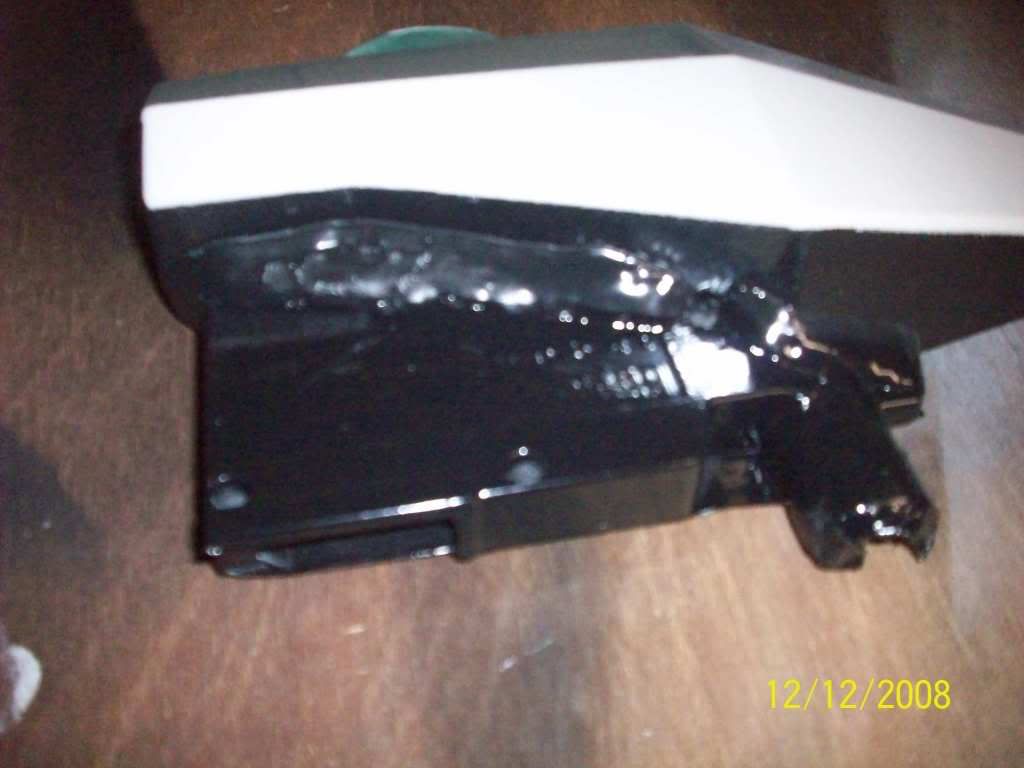
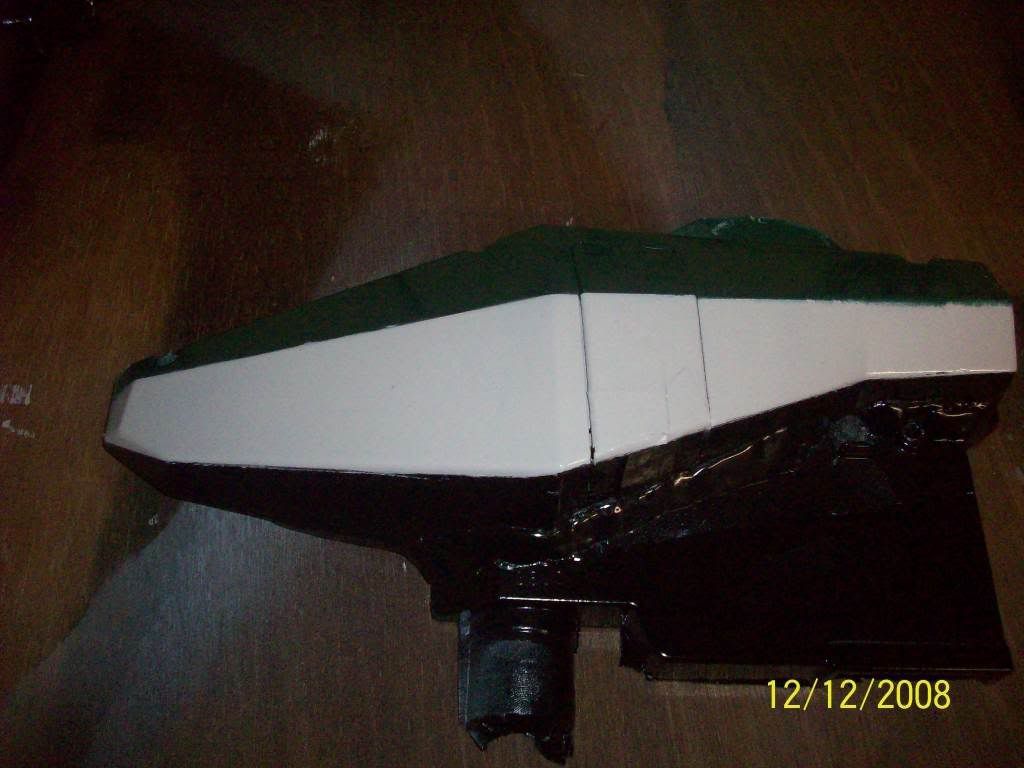
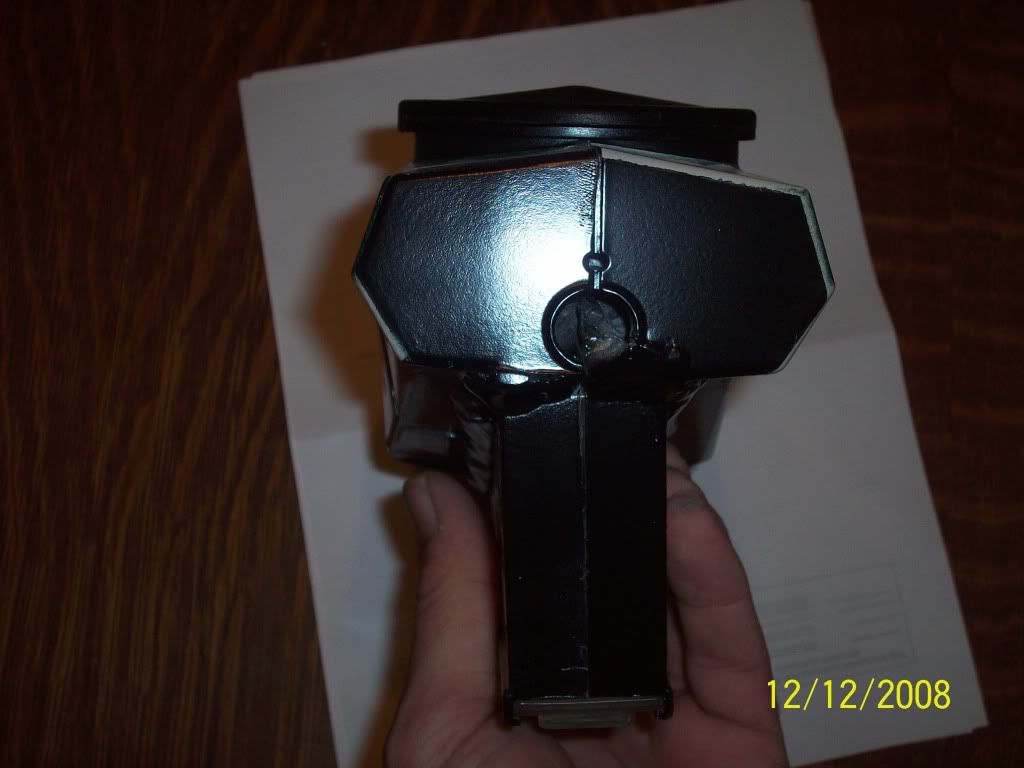
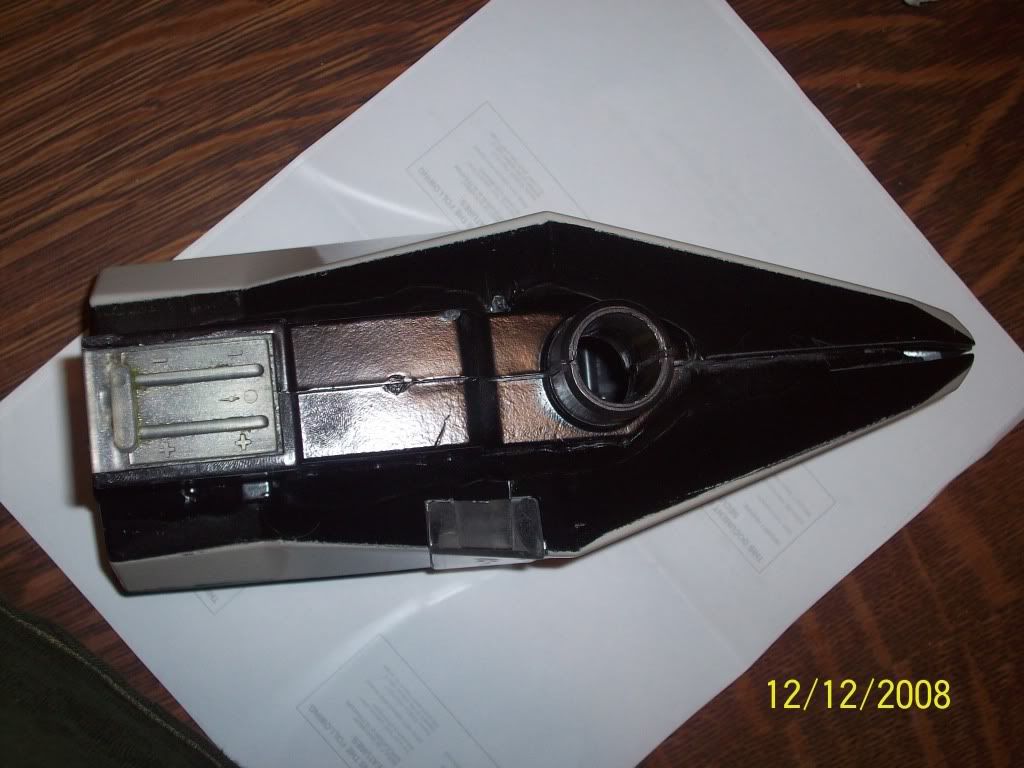
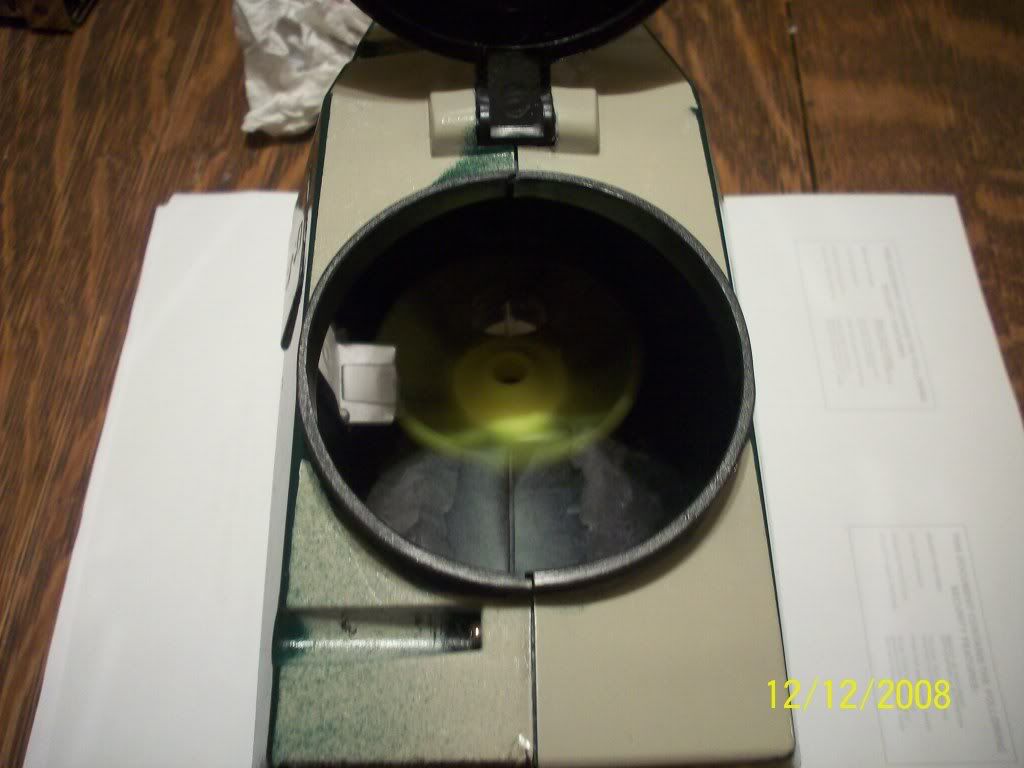
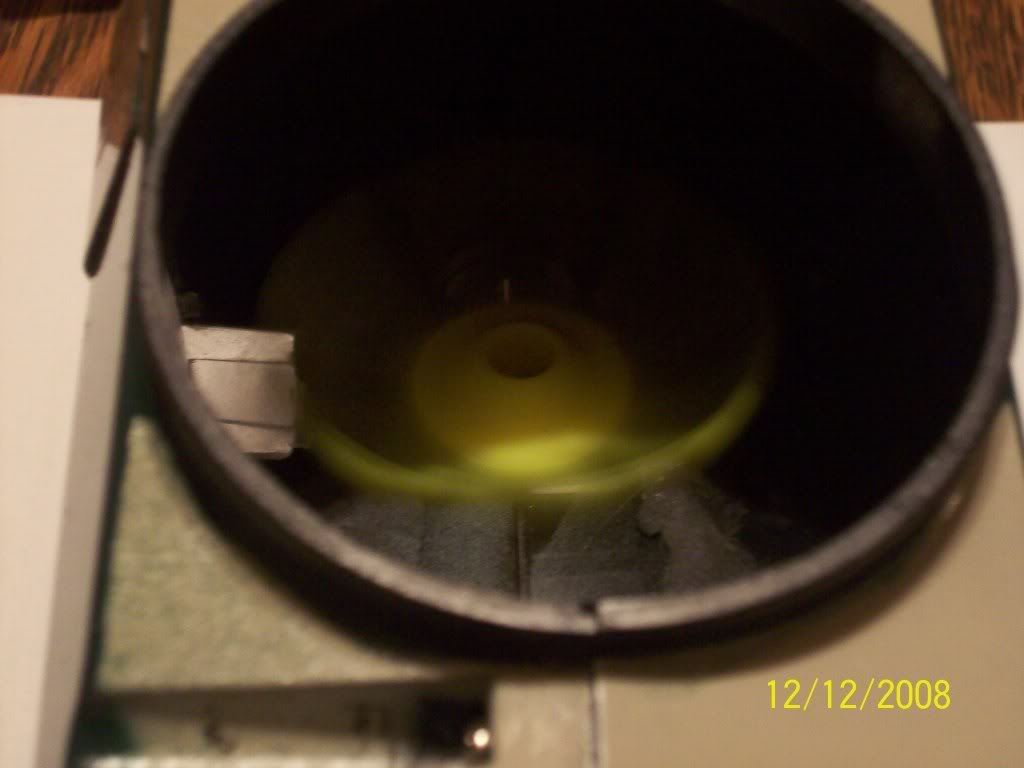
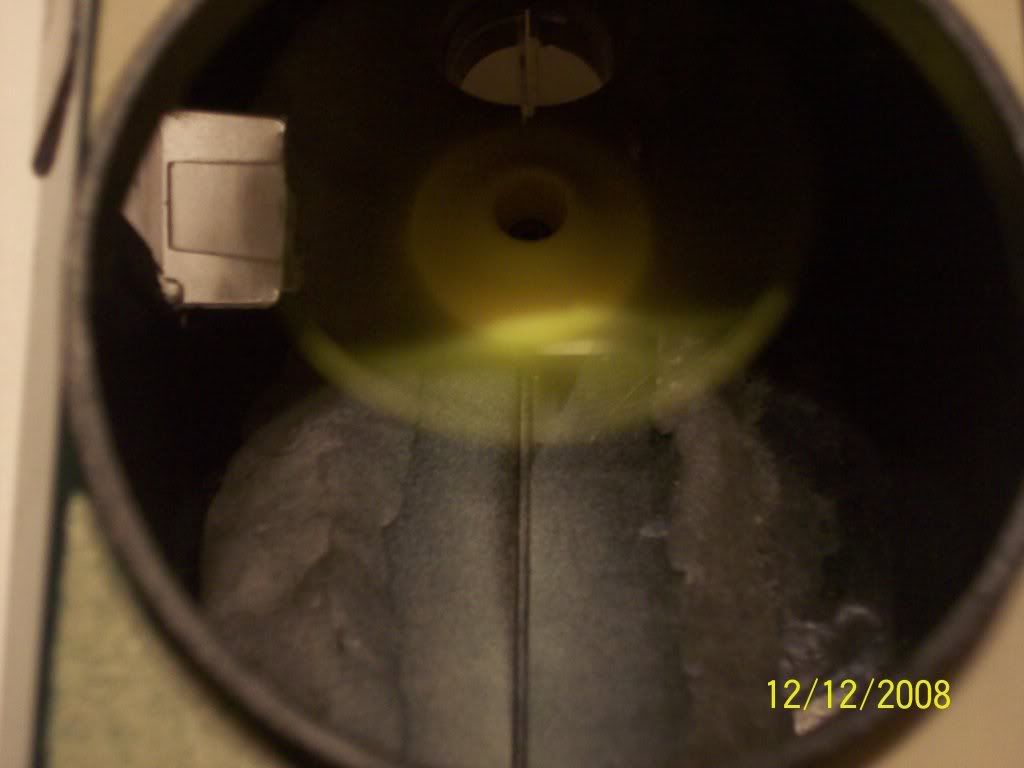
    Enter my [re]creation...

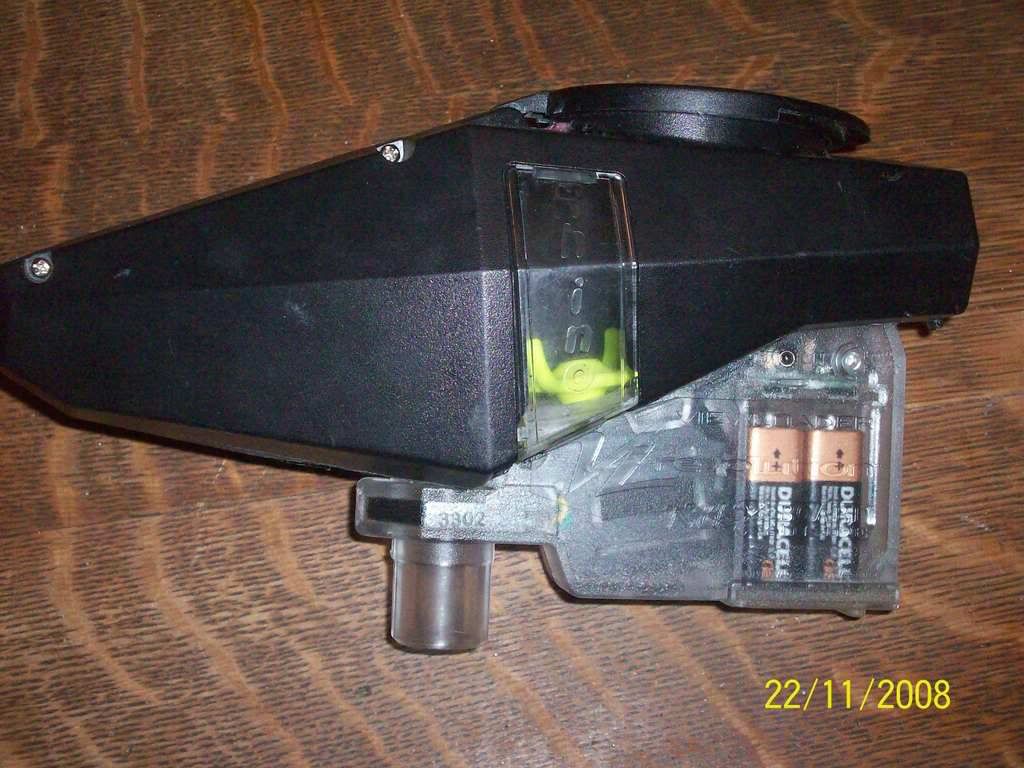
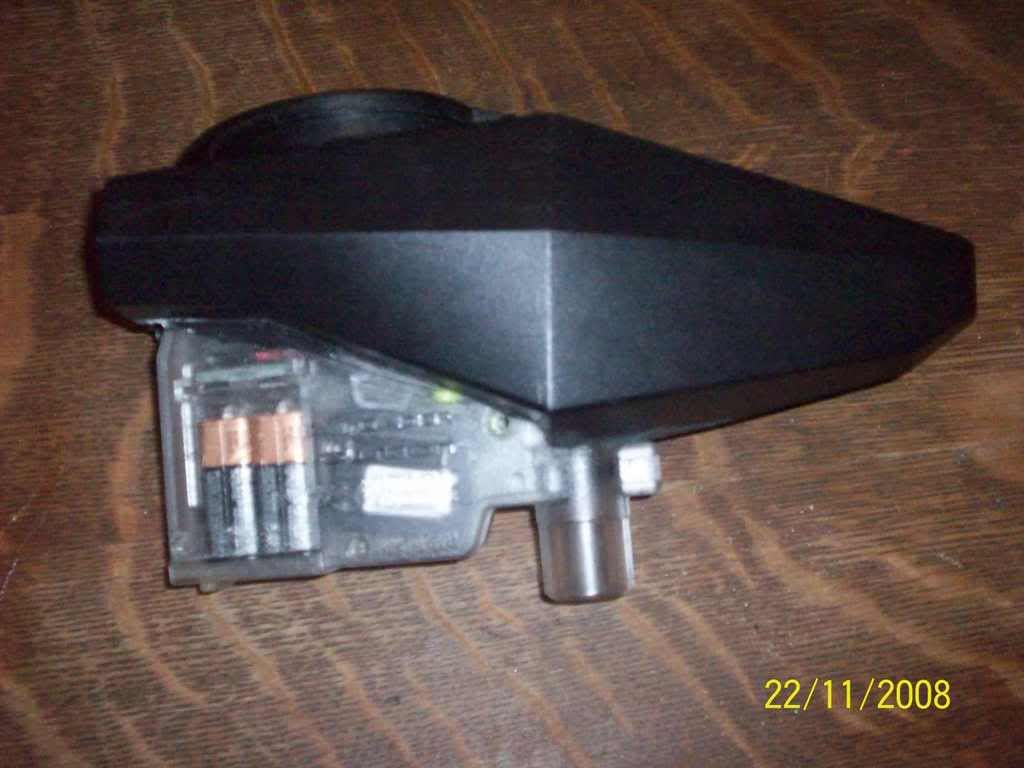
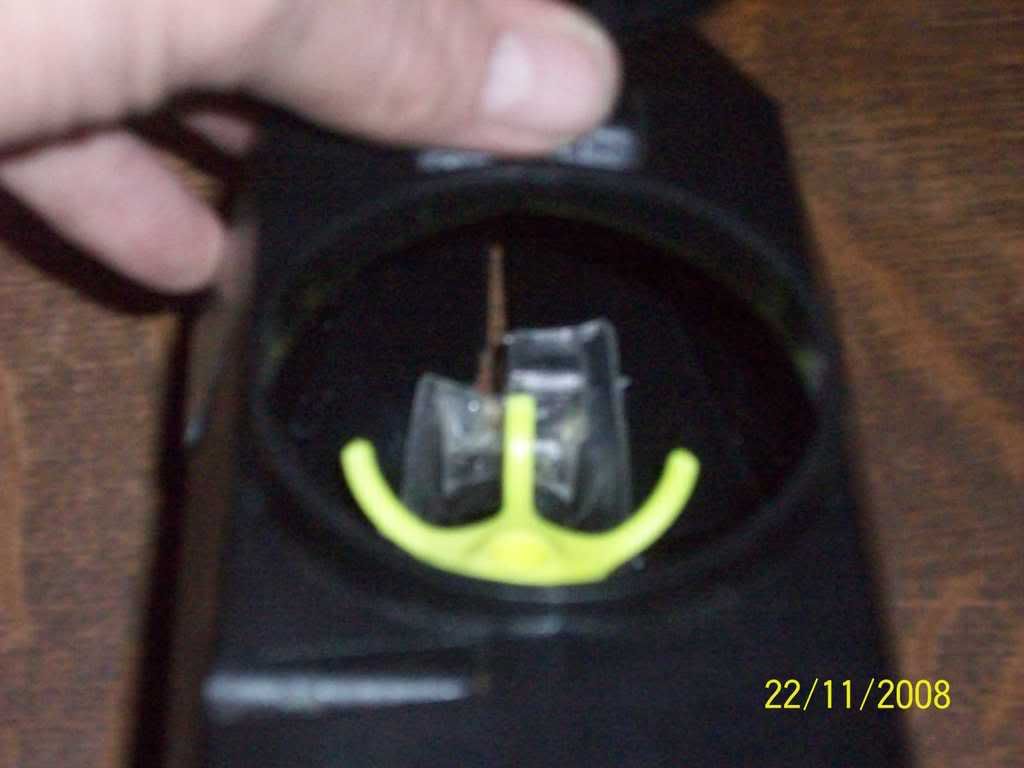
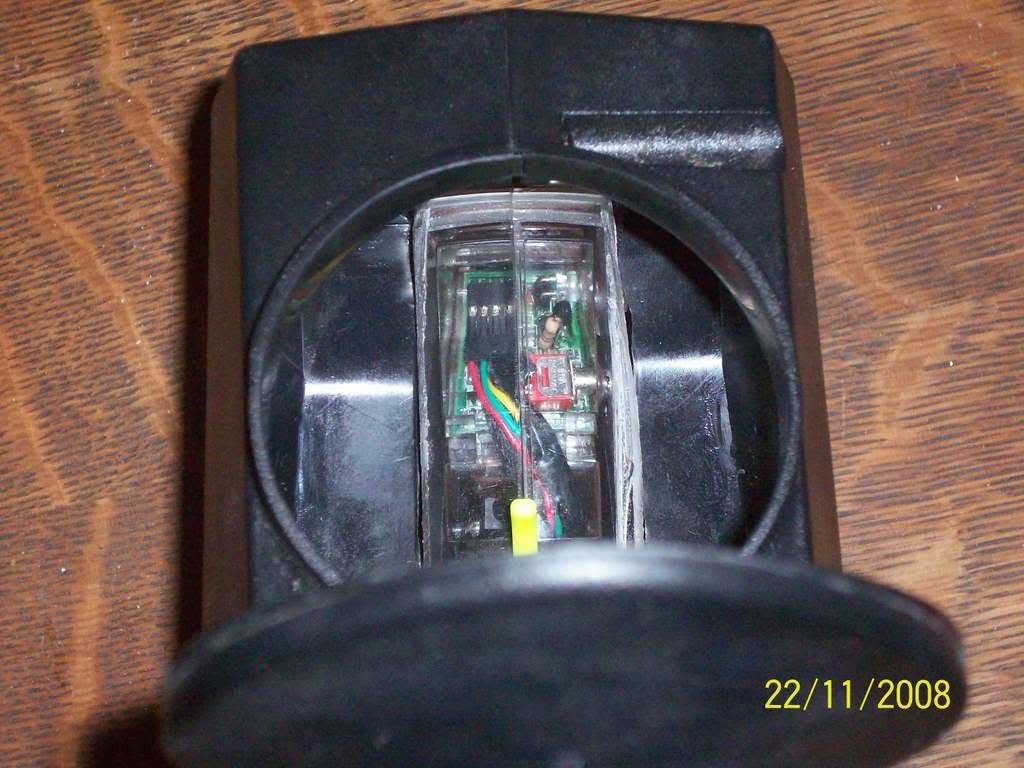
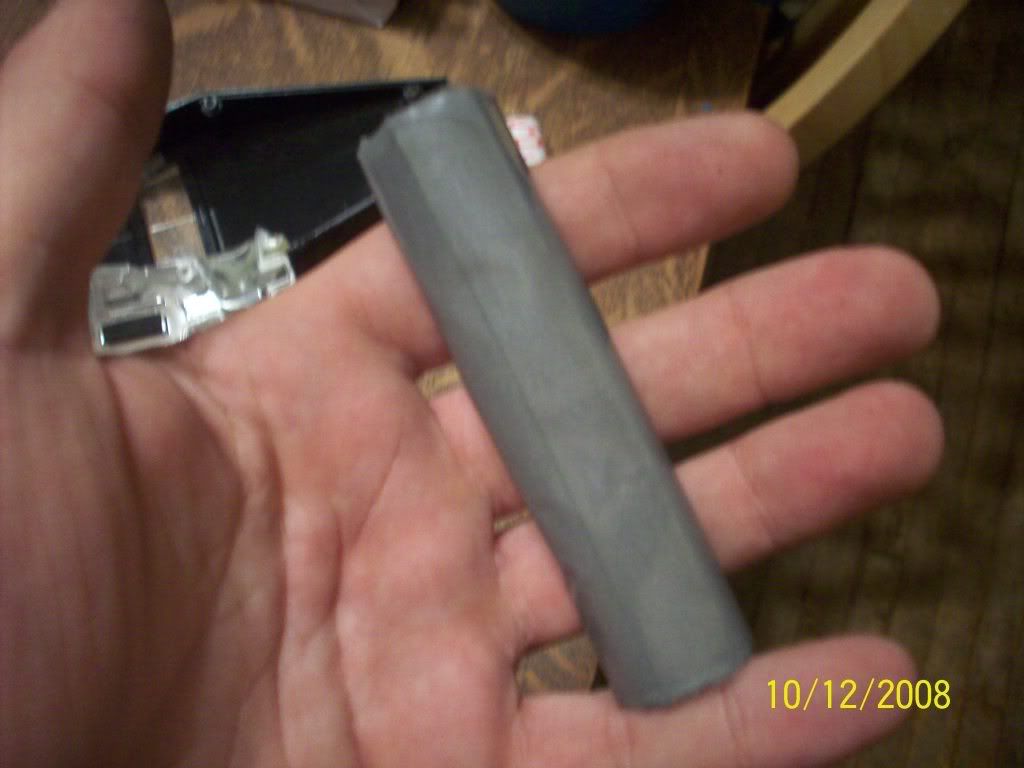
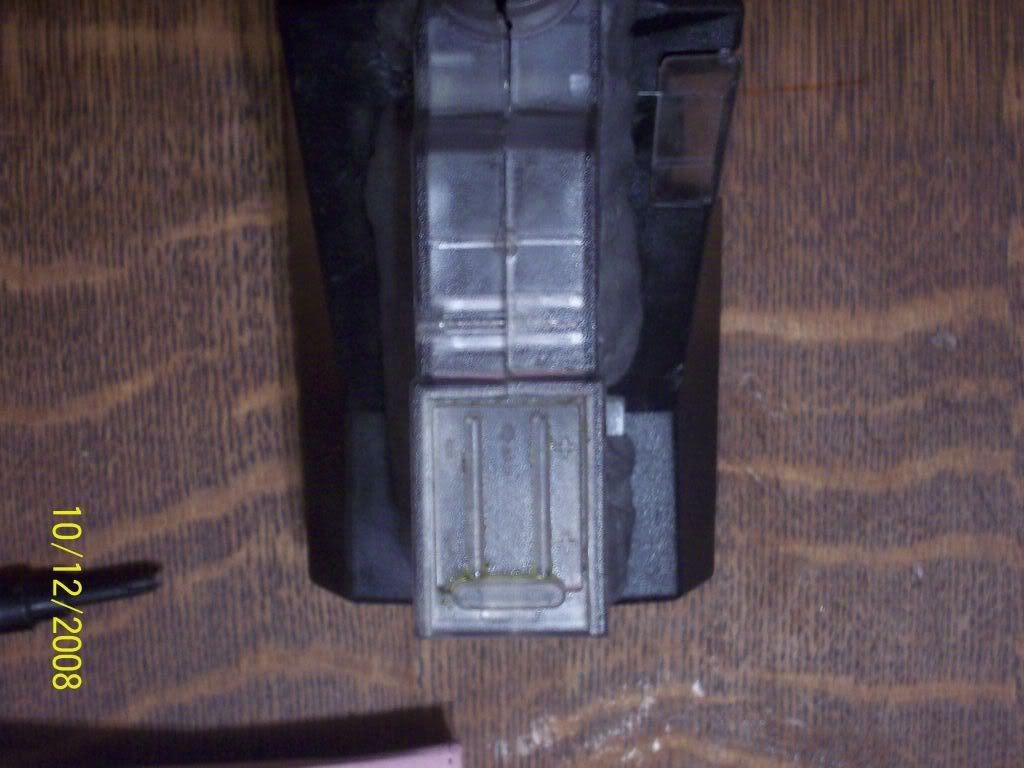
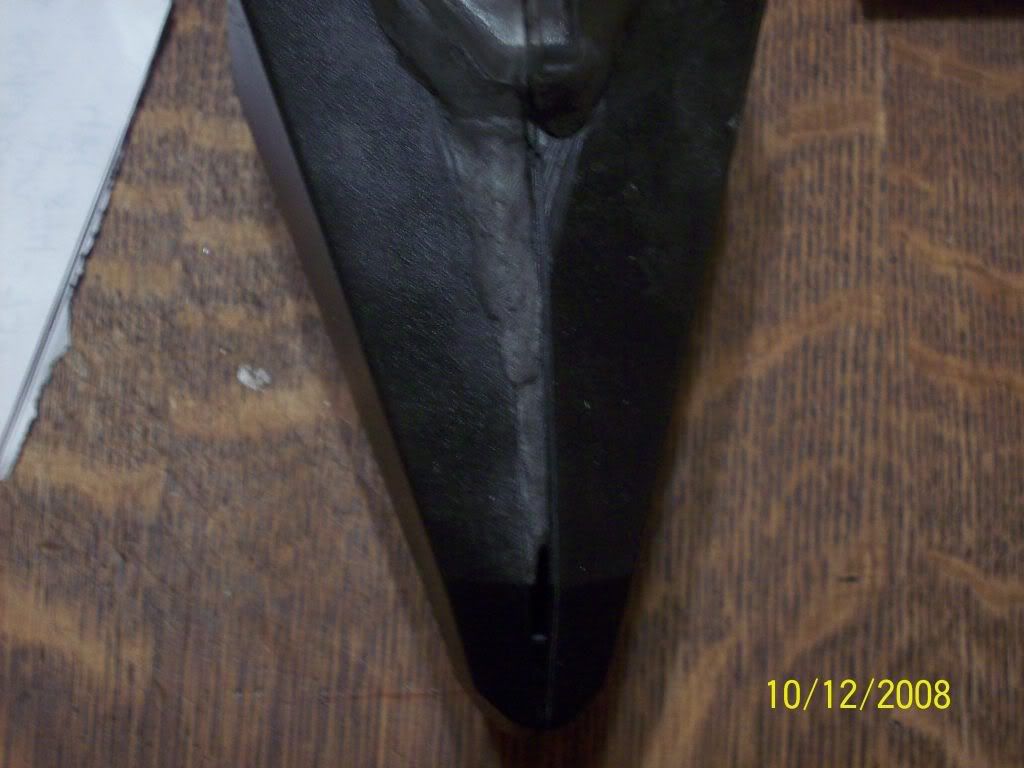
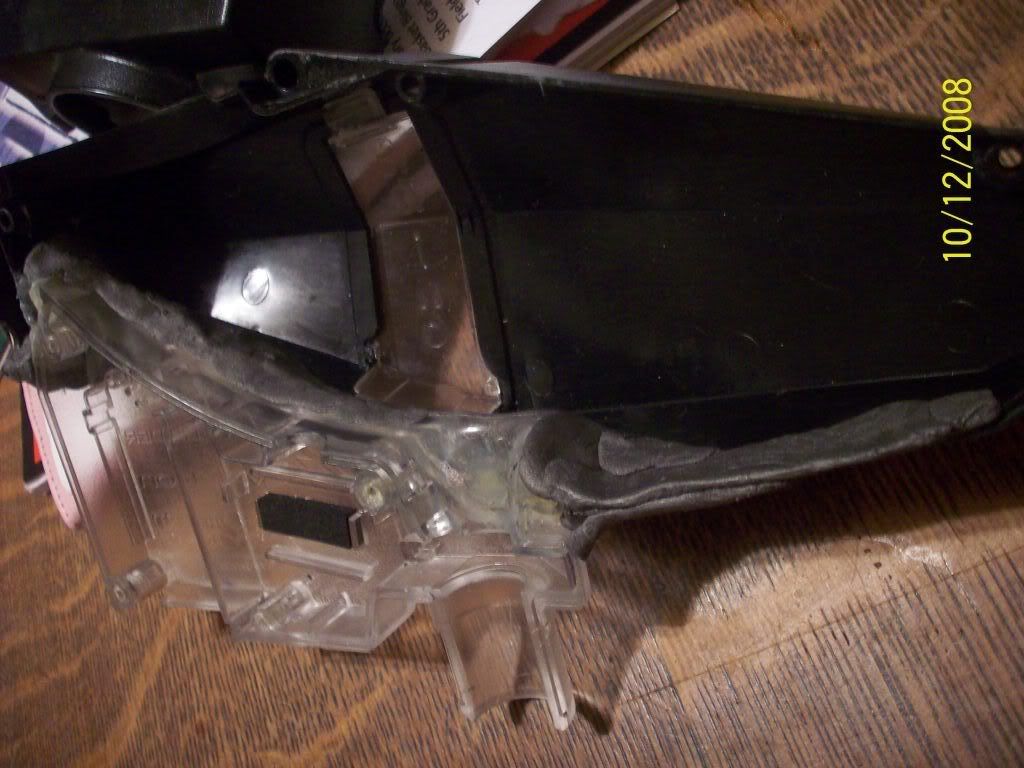
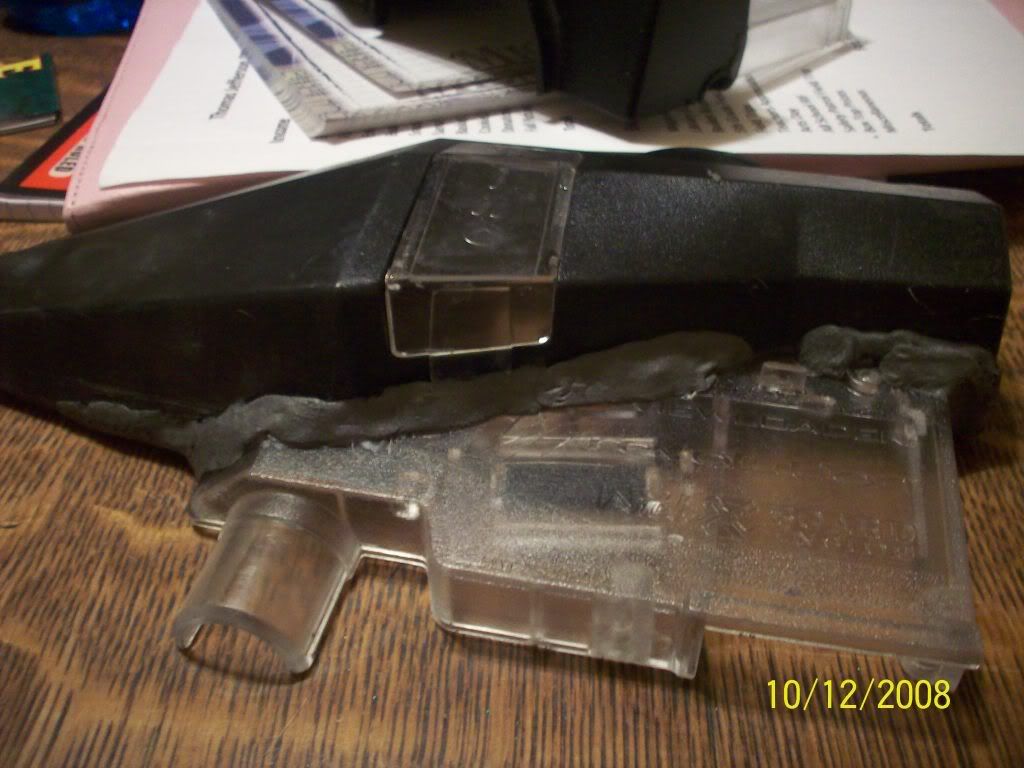
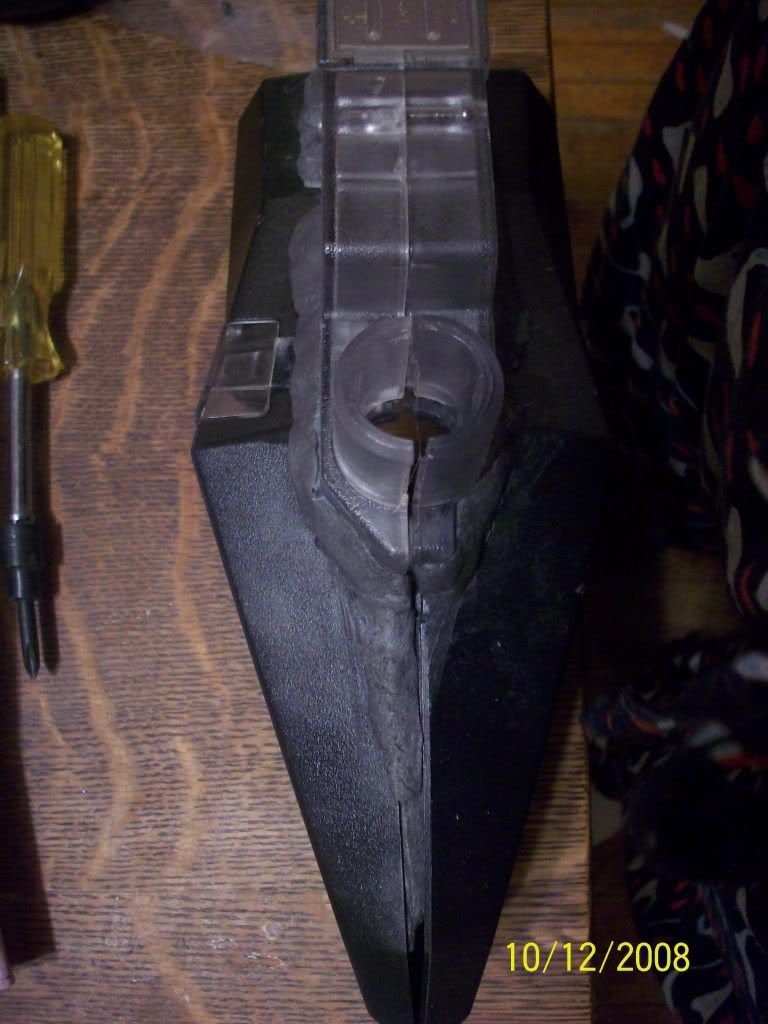
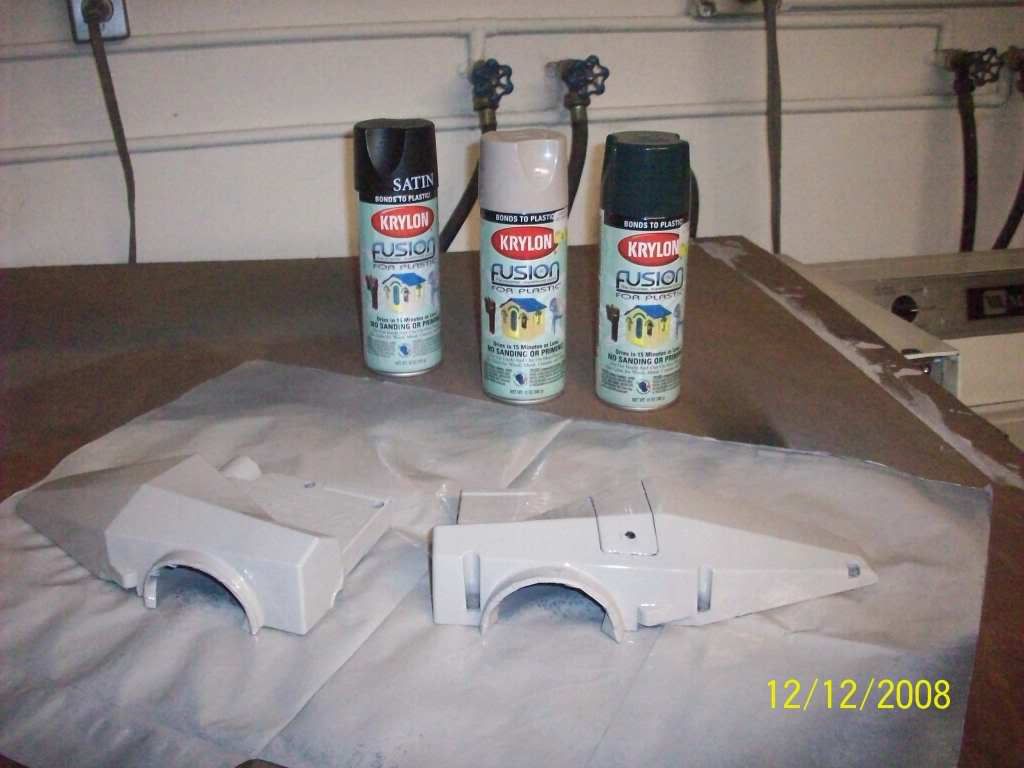
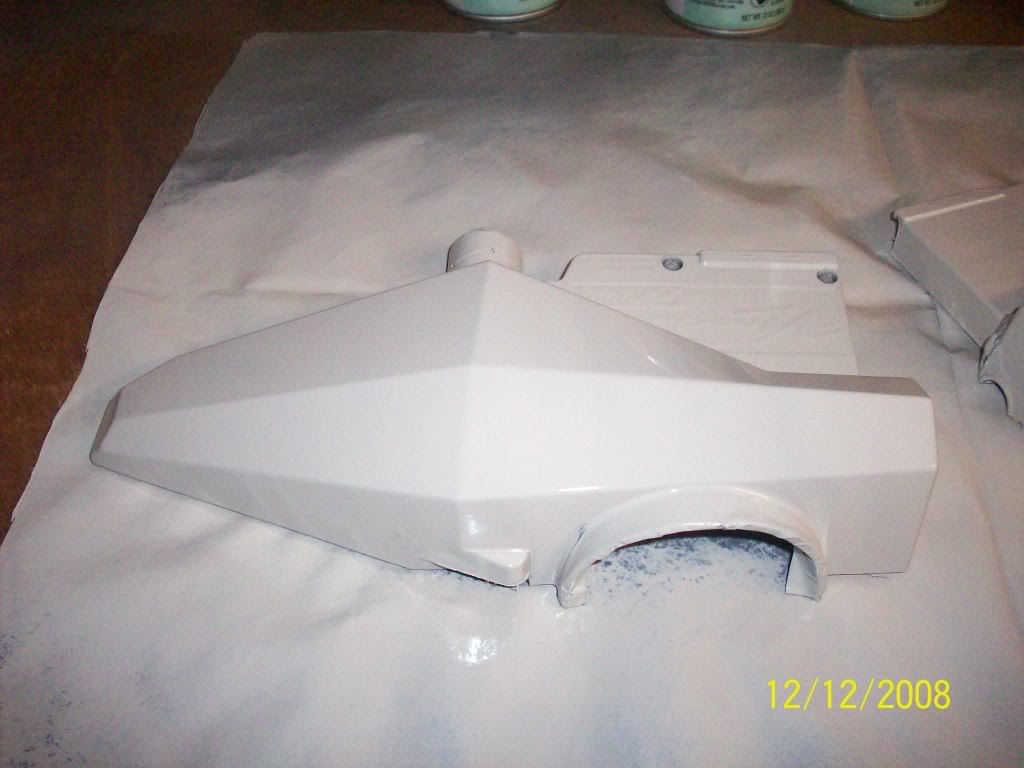
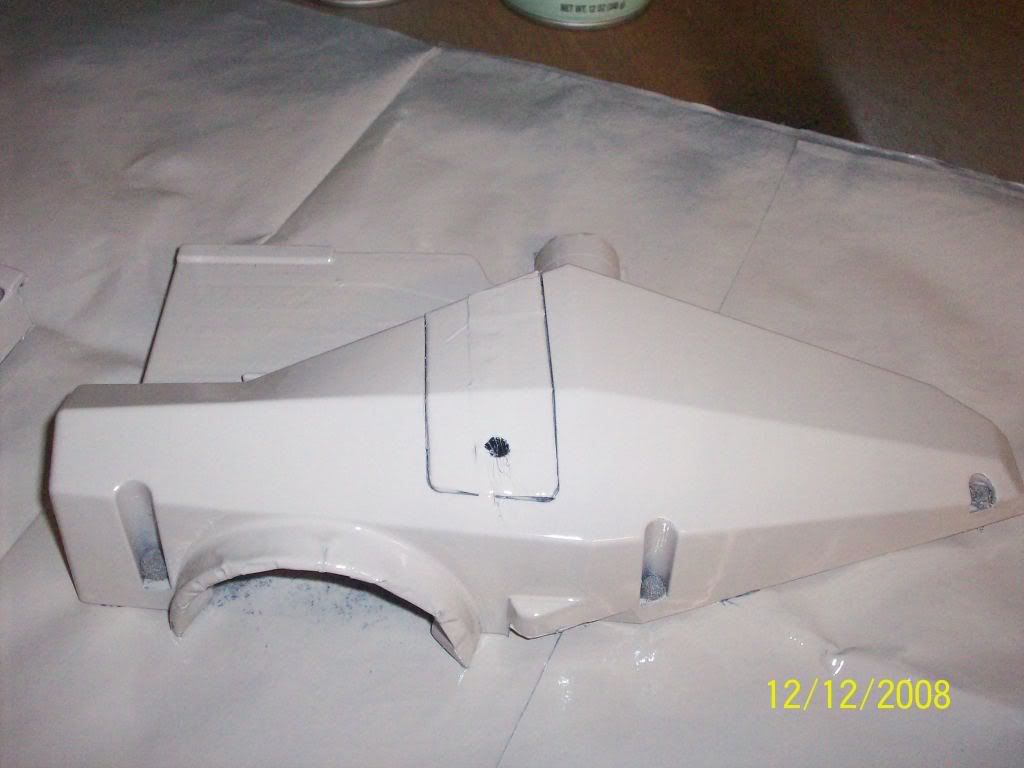
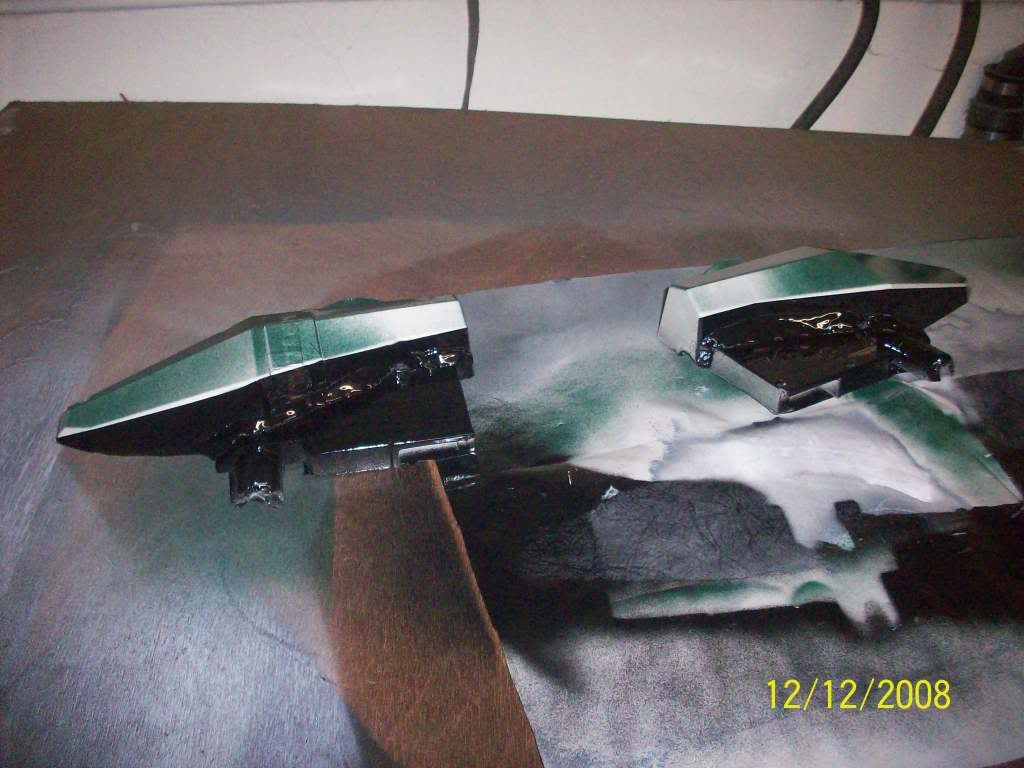
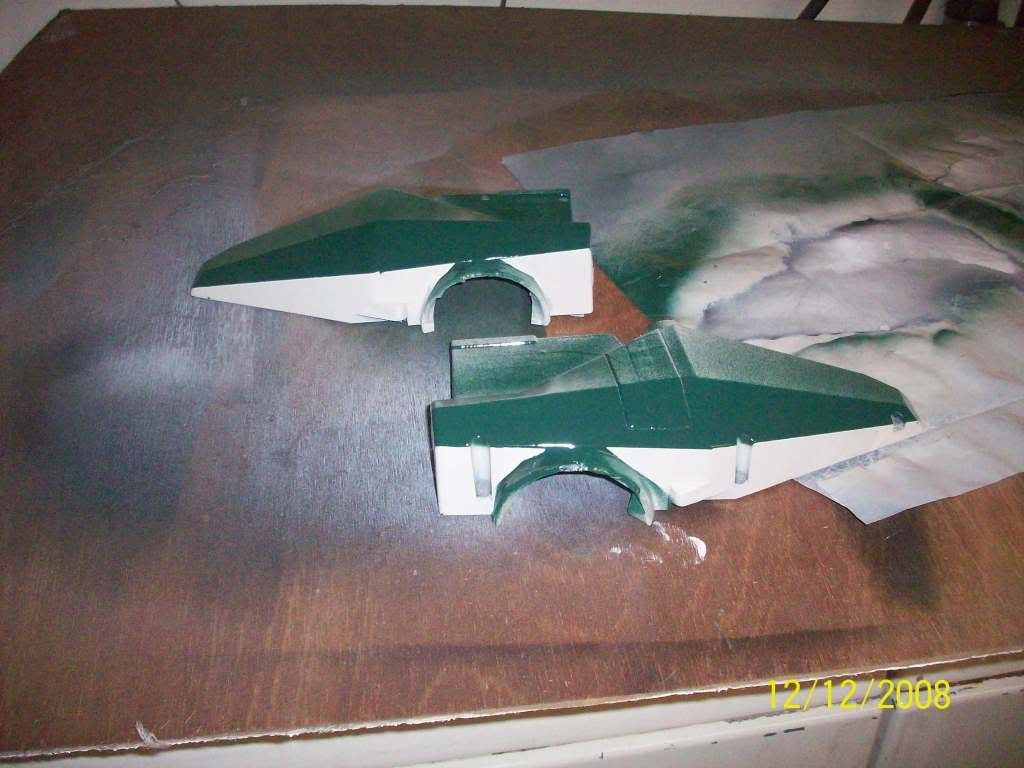
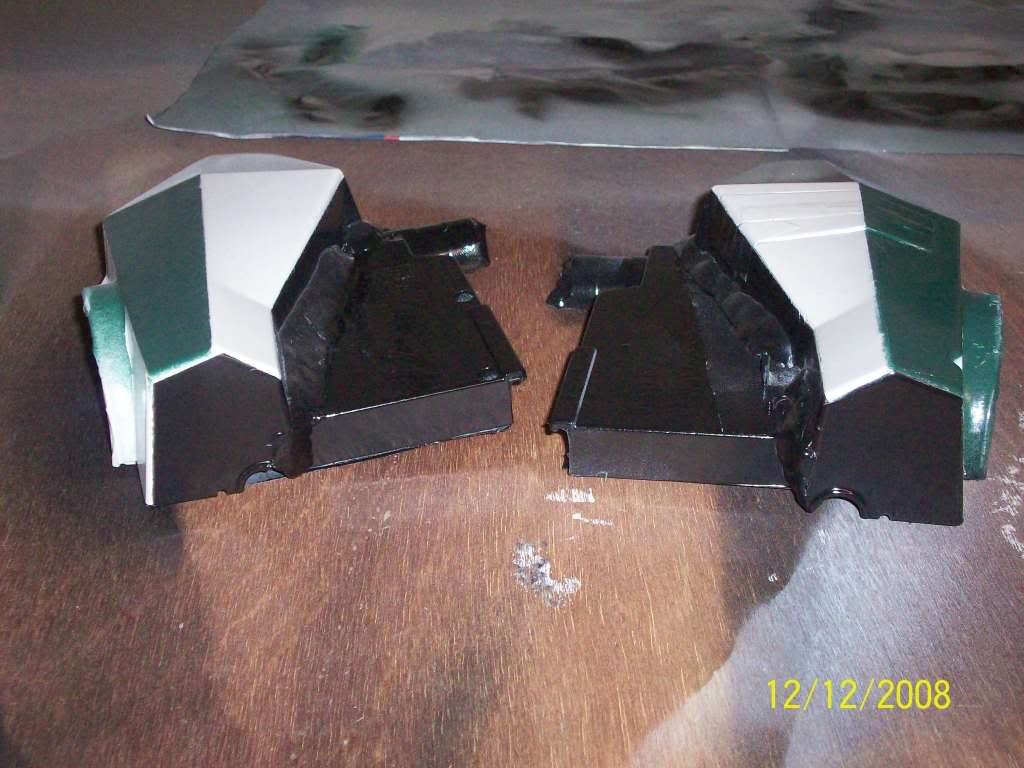
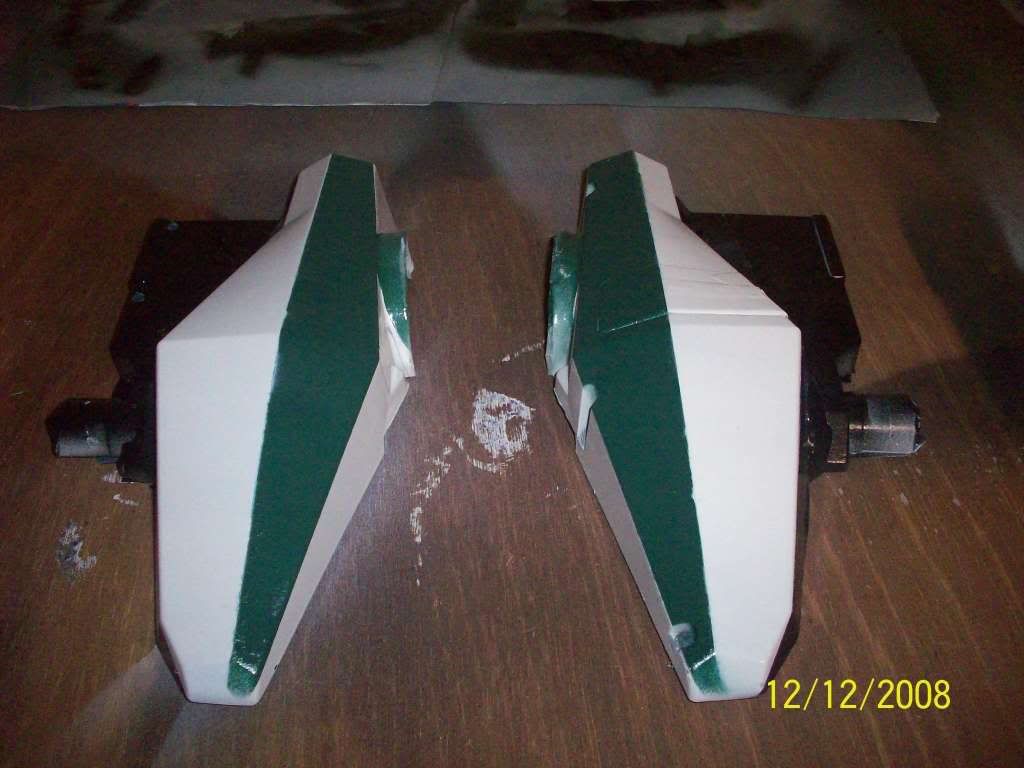
    My new RicoLution. It's not finished yet and I will be cleaning up the "roughness" with paint and putty but that will have to wait at the moment. I wanted to show you the progress so far. I'm sorry I only have these pics but you can figure out what I did from them.

    Ricochet hopper and lid, fitted over the Revolution lower, impeller, board and feedneck. It works and spins out paint very nicely.


    Last edited by druid; 11-23-2008 at 11:13 PM.

  2. #2
    Pretty cool, i was hoping for something more monstrous personally haha, but you did a good clean job.

  3. #3
    Join Date
    Mar 2006
    Location
    610 PA
    Posts
    559
    Quote Originally Posted by snoopay700
    Pretty cool, i was hoping for something more monstrous personally haha, but you did a good clean job.
    Thanks. I need to put putty in where the parts meet together because there's a lot of jagged edges around. That will also make painting and aesthetics a lot nicer.

  4. #4
    Quote Originally Posted by druid
    Thanks. I need to put putty in where the parts meet together because there's a lot of jagged edges around. That will also make painting and aesthetics a lot nicer.
    It's waterproof putty, right? I mean if a ball breaks in the hopper or something it would suck if it's not, and it most likely is but just making sure.

  5. #5
    Join Date
    Apr 2004
    Location
    Kennewick, WA
    Posts
    940
    I would go with an epoxy or a resin over putty. But it looks nice.

    My Feedback
    (It's a work in progress)

  6. #6
    Join Date
    Mar 2006
    Location
    610 PA
    Posts
    559
    the putty I have in mind is the fiberglass counterpart to JB Weld putty rod for metal. It's a solid, binary compound in a tube that looks like a Swiss Roll. You cut a dose off and knead it together and then lay it in the area being fixed. It's waterproof, sandable and paintable.........but I'm out of it and need to get more on Payday.

  7. #7
    Join Date
    Jan 2001
    Location
    Cottonwood, Az.
    Posts
    8,185
    Cool idea!

    I've had an idea brewing for years that is very similar to that (but very diffrent).

  8. #8
    Join Date
    May 2006
    Location
    The Netherlands
    Posts
    819
    Quote Originally Posted by druid
    the putty I have in mind is the fiberglass counterpart to JB Weld putty rod for metal. It's a solid, binary compound in a tube that looks like a Swiss Roll. You cut a dose off and knead it together and then lay it in the area being fixed. It's waterproof, sandable and paintable.........but I'm out of it and need to get more on Payday.
    I know that you mean... We have something like this that is called "kneadable steel" and it's hardens up to that degree. Maybe that is not what you are looking for... Does it still bond after being submitted to shocks? (a.k.a. paintball hits) I would personally go for epoxy resin.

    Very nice idea tho... Your getting the best of 2 worlds this way.

  9. #9
    Join Date
    Sep 2008
    Location
    Middletown, Va
    Posts
    976

    very cool

    very cool man. hopefully all works as it should. I would have a hard time painting that. It looks pretty sweet as it is. Now i wanna do something to that affect...

  10. #10
    Join Date
    Mar 2006
    Location
    610 PA
    Posts
    559
    Quote Originally Posted by FiXeL
    I know that you mean... We have something like this that is called "kneadable steel" and it's hardens up to that degree. Maybe that is not what you are looking for... Does it still bond after being submitted to shocks? (a.k.a. paintball hits) I would personally go for epoxy resin.

    Very nice idea tho... Your getting the best of 2 worlds this way.
    I know that it takes force very well but I'm unsure of the "shock" factor. Perhaps I'll first secure the shells with the epoxy resin and then cover that with the putty because it can be smoothed over to make nice seams.

    Quote Originally Posted by TeamBob
    very cool man. hopefully all works as it should. I would have a hard time painting that. It looks pretty sweet as it is. Now i wanna do something to that affect...
    Thanks but it's getting painted (at least...the bottom is). I'll hit it up with black first and see how I like it and if not...camo we go....lol. I only do woodsball/scenario anymore so I don't care about flash-factor...and I HATE clear shelled anythings.

    All it takes is an imagination and then a pencil and paper to sketch out your idea.

  11. #11
    nice blend of techs to get the best of both likes. Looks pretty good, as some others had mentioned i was expecting something a wee more monstrous/hideous...

    Should come together quite nicely when your done. Be sure to come back and post up the finished product.. my wheels are starting to turn now.. hmmmm

  12. #12
    Join Date
    Mar 2006
    Location
    610 PA
    Posts
    559
    Quote Originally Posted by MechMags
    nice blend of techs to get the best of both likes. Looks pretty good, as some others had mentioned i was expecting something a wee more monstrous/hideous...

    Should come together quite nicely when your done. Be sure to come back and post up the finished product.. my wheels are starting to turn now.. hmmmm
    I will. After I get the top and bottoms secured to my liking, I'll do a video drop test and then another (hopefully) on my Pro Classic...provided my computer mental-midgetness doesn't screw it up lol.

  13. #13
    Join Date
    Mar 2006
    Location
    610 PA
    Posts
    559

    UPDATE - The unfinished monster....

    HERE'S AN UPDATE OF WHAT i'VE DONE SINCE THE INITIAL POST.


    I went to Advanced Auto and picked up a tube of Plastic Weld. It's a binary compound that you mix. I fused the shells together with it by laying it in the joins with a Q-Tip.


    And then I got two tubes of JB Weld Stick...also a binary compound but a soft solid. Second pic is what it will mend


  14. #14
    Join Date
    Mar 2006
    Location
    610 PA
    Posts
    559


    You tear or cut a piece off and knead it to one color. Notice it's darker than the stick. YOU HAVE ABOUT 3 MINUTES TO GET IT TO WHERE YOU WANT IT because it starts to cure that fast...


    and roll it into a cylinder-looking thing...


    and squish it into the areas being joined. not only does this strengthen the plastic weld, it also acts as a filler for spaces you want to devoid of space.


  15. #15
    Join Date
    Mar 2006
    Location
    610 PA
    Posts
    559


    Now the directions say that within 10 minutes it's cured that you can move it, 1 hour to put a slight load on it and 24 hours for absolute full cure and hardest set.

    I'm going to wait the 24 hours and sand it smooth and see about painting it.

  16. #16
    Looks good, can't wait to see it painted.

  17. #17
    Join Date
    Mar 2006
    Location
    610 PA
    Posts
    559
    MMMMMMMMMMmmmmm.....painted goodness..gotta touch up the black though, got some fingerprints in the paint when I thought it was dry enough (but wasn't)....

    This is only a preliminary test for this particular paint scheme. I want to see how well it works out in our woods before I tighten up the paint job. If it doesn't work out, I'll be changing it completely so there was no need to go "all out" just yet...


    Last edited by druid; 12-13-2008 at 06:31 AM.

  18. #18
    Join Date
    Mar 2006
    Location
    610 PA
    Posts
    559


  19. #19
    Join Date
    Mar 2006
    Location
    610 PA
    Posts
    559


    Impeller spinning....


  20. #20
    Join Date
    Jan 2001
    Location
    Cottonwood, Az.
    Posts
    8,185
    OK, now send it to me and I'll make a mold of it to cast the the shells!

    Can the JB weld be sanded down smoother?

  21. #21
    Join Date
    Mar 2006
    Location
    610 PA
    Posts
    559
    Quote Originally Posted by luke
    OK, now send it to me and I'll make a mold of it to cast the the shells!

    Can the JB weld be sanded down smoother?
    Are you serious? I could do that....for the cost of one of your Universal Warp brackets

    I wish it could...After I let it cure the 24 hours, I used two brand new 200 grit (super rough) sanding sponges and burned them BOTH out without removing much material at all. Then I tried the sanding drums on my Dremel....same thing. I had to paint it as-is. LESSONS LEARNED.....USE LESS OF THE JB WELD STICK.

  22. #22
    Join Date
    Sep 2004
    Location
    in the corner in a box under the stairs right down the street from jerry's bait shop.
    Posts
    2,462
    last time i ended up using the JB weld stick i ended up sanding it down with some sort of hard sponge sanding thing. i have no idea what the name of it is... worked pretty well.

    with all of that on there now, how heavy did it make it?
    "Ah yes, I have one of the 32*rebels that I always take to big scenario games. It keeps the truck from rolling if I have to park on a hill." - automikey

  23. #23
    Join Date
    Jan 2001
    Location
    Cottonwood, Az.
    Posts
    8,185
    Are you serious?
    If the hopper worked well and the two halves fit together well, sure. I would probably have to to do some cleanup on your JB welds and smooth the parts over real nice which would ruin your paint job.

    I could do that....for the cost of one of your Universal Warp brackets
    Nah, I would have over $150 tied up in materials just to see if it was possible for me to make the molds and cast them into a usable part. Not to mention the time involved in making the molds and making a "moldable" part out out of what you started. I would be glad to give you one of the finished parts if it were to work out. It would all depend how good of a job you did to start with.

  24. #24
    Join Date
    Mar 2006
    Location
    610 PA
    Posts
    559
    Quote Originally Posted by master_alexander
    last time i ended up using the JB weld stick i ended up sanding it down with some sort of hard sponge sanding thing. i have no idea what the name of it is... worked pretty well.

    with all of that on there now, how heavy did it make it?
    Those are the sanding sponges I used and I burned them both out without making a dent in the weld. I simply used too much. As to the weight, it added perhaps 6oz...8 tops.

    Quote Originally Posted by luke
    If the hopper worked well and the two halves fit together well, sure. I would probably have to to do some cleanup on your JB welds and smooth the parts over real nice which would ruin your paint job.


    Nah, I would have over $150 tied up in materials just to see if it was possible for me to make the molds and cast them into a usable part. Not to mention the time involved in making the molds and making a "moldable" part out out of what you started. I would be glad to give you one of the finished parts if it were to work out. It would all depend how good of a job you did to start with.
    Obviously, I was kidding about the bracket. I guess I used the wrong smiley to show that...lol....

    As to the rest, I have yet to do a drop test and other checks before I do anything else. I will report my findings though..

  25. #25
    Join Date
    Jan 2001
    Location
    Cottonwood, Az.
    Posts
    8,185
    Obviously, I was kidding about the bracket. I guess I used the wrong smiley to show that...lol....
    Its cool no offence taken. If things weren’t so tight right now it wouldn’t be that big of a deal.

    As to the rest, I have yet to do a drop test and other checks before I do anything else. I will report my findings though..
    I hope you weren’t talking literally when you said “drop test”. (JK I know what you mean )

    In respect to making the molds, as long as the parts (i.e. the two hoppers) work together properly and the two halves fit perfectly it would be a good candidate for making a mold.

    As far as the cosmetics go, that’s less important because it can be cleaned up a number of different ways in order to make a clean smooth moldable part.

    If this actually worked, meaning I was able to produce a nice molded part, it would open the door to an idea I’ve had in the back of my mind for quite a few years. It would involve parts and pieces from 3 different manufacturers.
    Last edited by luke; 12-14-2008 at 11:45 AM.

  26. #26
    Join Date
    Mar 2006
    Location
    610 PA
    Posts
    559
    Quote Originally Posted by luke
    Its cool no offence taken. If things weren’t so tight right now it wouldn’t be that big of a deal.


    I hope you weren’t talking literally when you said “drop test”. (JK I know what you mean )

    In respect to making the molds, as long as the parts (i.e. the two hoppers) work together properly and the two halves fit perfectly it would be a good candidate for making a mold.

    As far as the cosmetics go, that’s less important because it can be cleaned up a number of different ways in order to make a clean smooth moldable part.

    If this actually worked, meaning I was able to produce a nice molded part, it would open the door to an idea I’ve had in the back of my mind for quite a few years. It would involve parts and pieces from 3 different manufacturers.
    Actually...before I painted it I was banging it around on my table seeing it it fell apart. Not enough to crack the shells but more than a simple tap. Not even a creak between the plastics...

    The outsides fit very nicely together but inside where the neck meets the upper shells, I want to make some tests because when you look at the pics, the feedneck mouth had to be in pretty far (almost 3/4") to make them work together without further cutting for the impeller. Look to the interior pics and see that "ramp" I had to make to allow the paint to roll down from the front to the neck. I'm hoping that I don't have to make a tray like an Egg to allow better and even feeding but the more I look at it, the more I think I have to. Perhaps in your mouldings, you can trim your templates to remove the top of where the feedneck enters the top shells. Perhaps later tonight or tomorrow I will throw a pod of paint in it and check but right now I'm getting ready for work.

    I have absolutely no problem sending this to you for your venture and if it works for you, The paint job I did means very little to me as it's only on right now to test this "pattern" for our woods and isn't the final scheme I plan on painting. Screwing it up is a "no biggie" for me.....lol. I'll PM you when my initial testing is done so we can work out the details.

    I'd gladly accept a set of shells - with or without your improvements

Posting Permissions

  • You may not post new threads
  • You may not post replies
  • You may not post attachments
  • You may not edit your posts
  •