-
Ego/Etek Mag conversion how to
Edit:
The oldest post i could find referring to what we call the Ego/pneu Mag design. Punisher's Customs did it first as best as I can find.
https://www.automags.org/forums/showthread.php?t=22012
I would also like to give credit to"latches109" for the idea and the original how to thread. Thanks for this easy to build design. It has led to many different custom mags.
https://www.automags.org/forums/showt...ghlight=emaggo /Edit
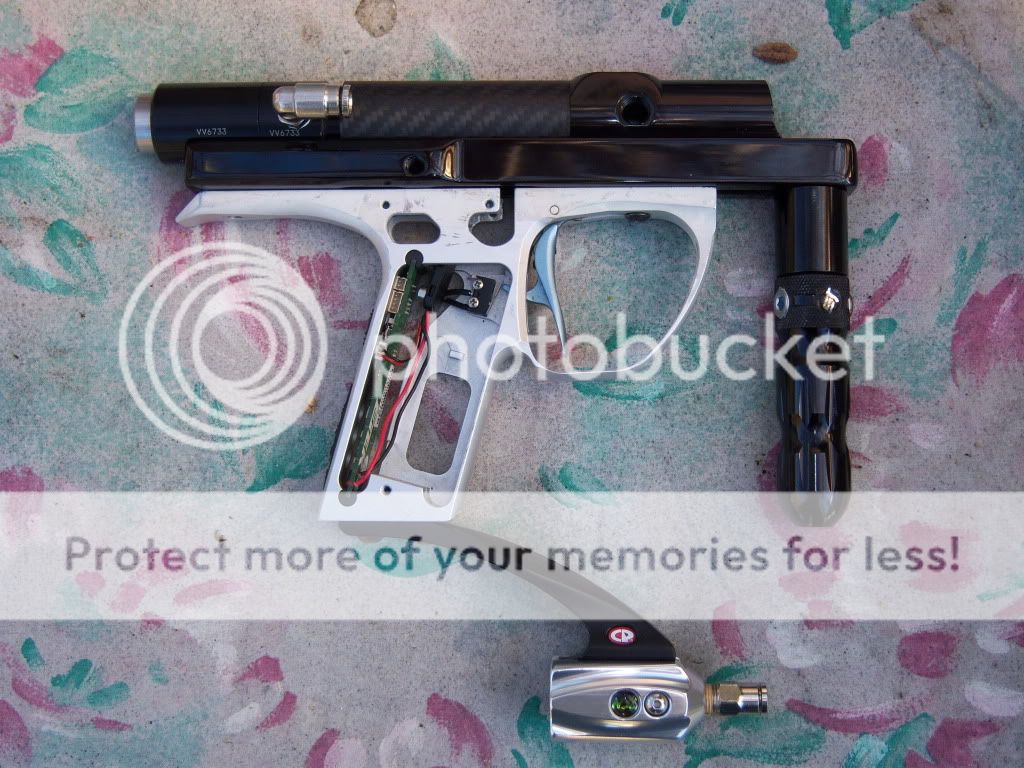
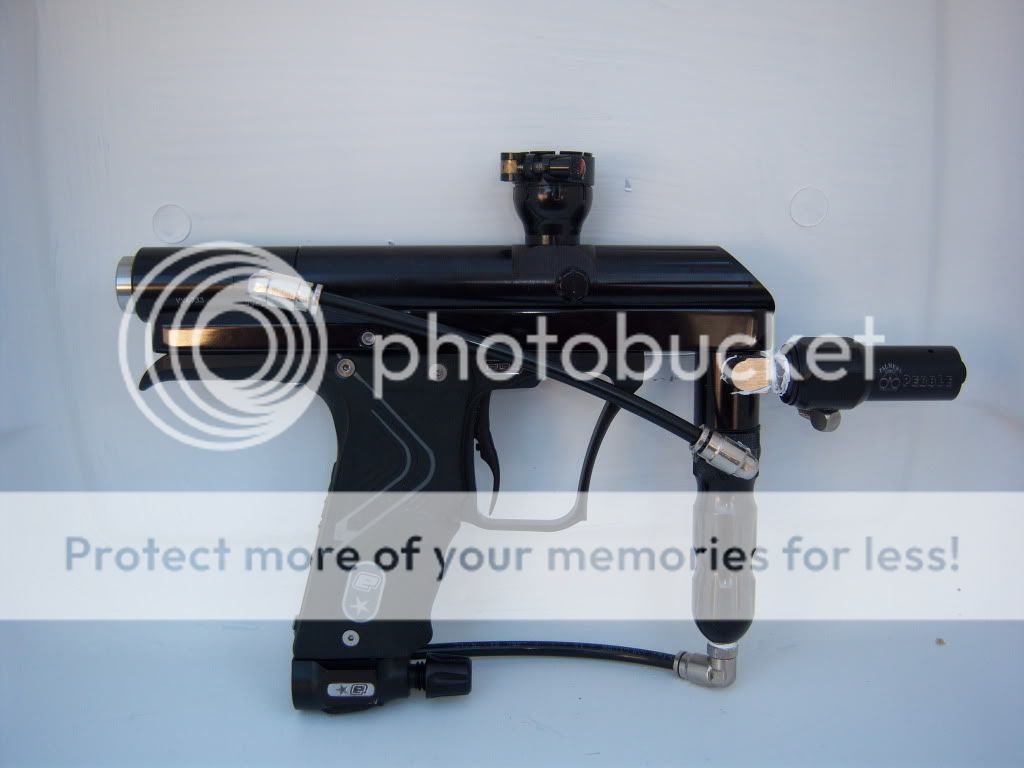
The purpose of this thread is to show how i am doing my ETEK-EP-Mag conversion. Keep in mind this is the first time i am performing the mod and welcome any advise from the pros on what i am doing wrong. I have a fine example done by Loguzzzzzz to guide me though. All measurements and instructions are specific to the parts i am using. This ETEK frame is almost identical to the star frame done by Loguzzzzzz
So here we go
My last build thread
https://www.automags.org/forums/showt...=arnolds+metal
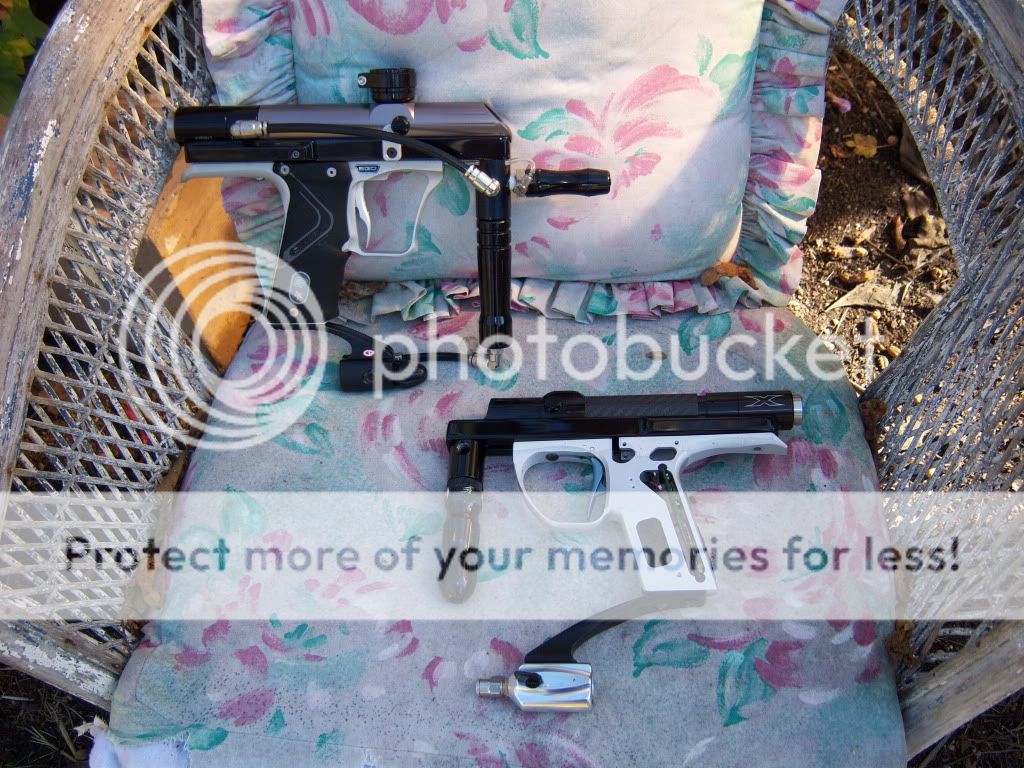
X Valve with LX bolt.
ETEK 2 frame with stock board.
RPG Recon Rail
Still going with the SMC-SDG-32 noid also the SMC SY113A-SG-PM3 will fit and handles higher pressure.
Ram (Clippard MPA-3, Machined/modified to fit by Loguzzzzzz)
LPR Palmer Pebble
For the eyes I am going to suggest people look into hidden Ego eyes developed by me and offered by Luke's Customs. Here is the thread to there development.
https://www.automags.org/forums/showt...67#post2760367
And here is Luke's website.
http://www.lukescustoms.com/page0018.htm
They make a nice couple.
Tools that you mite not have. You will need other tools but these are the ones you will most likely need to buy.
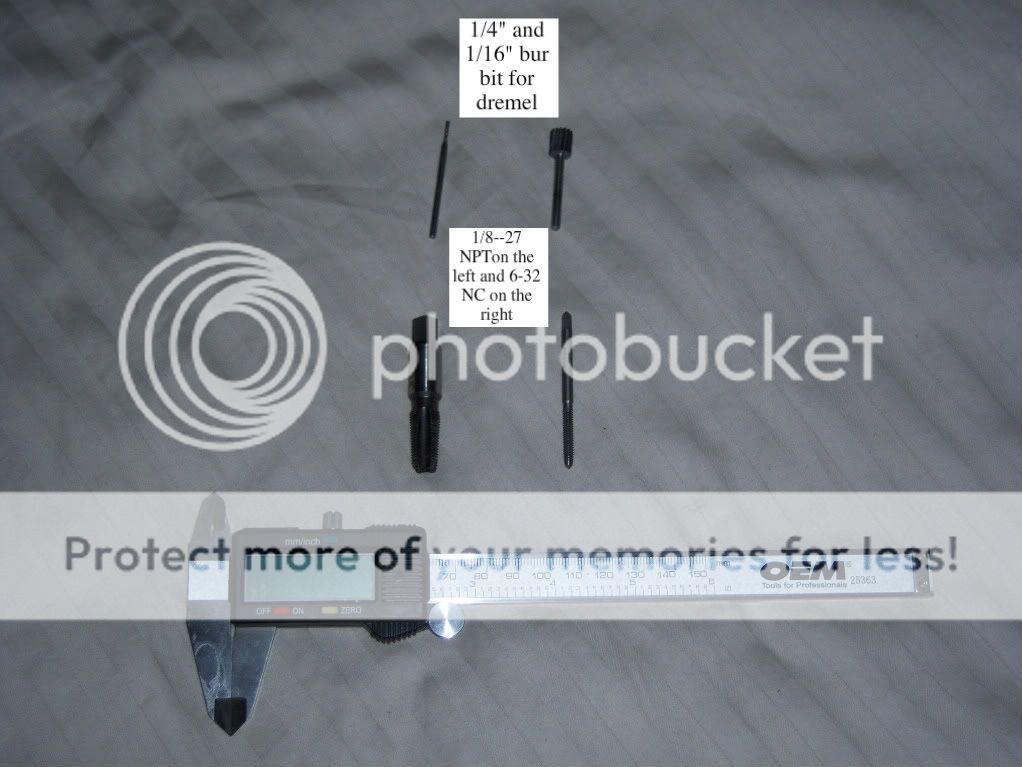
First off is laying out the ram location and set screws. Drill for the set screws with a 3/32 dril bit

Then you take out some material so the ram will fit with a little friction. You will need to take a bit off the width of the rail and also dremel out the area circled to get the fitting on the bottom of the ram to fit

Then tap the set screw holes with a 6-32 tap.

Then set the ram in its general location


Last edited by hill160881; 07-12-2012 at 10:47 AM.
Reason: to issue credit where it was due
-
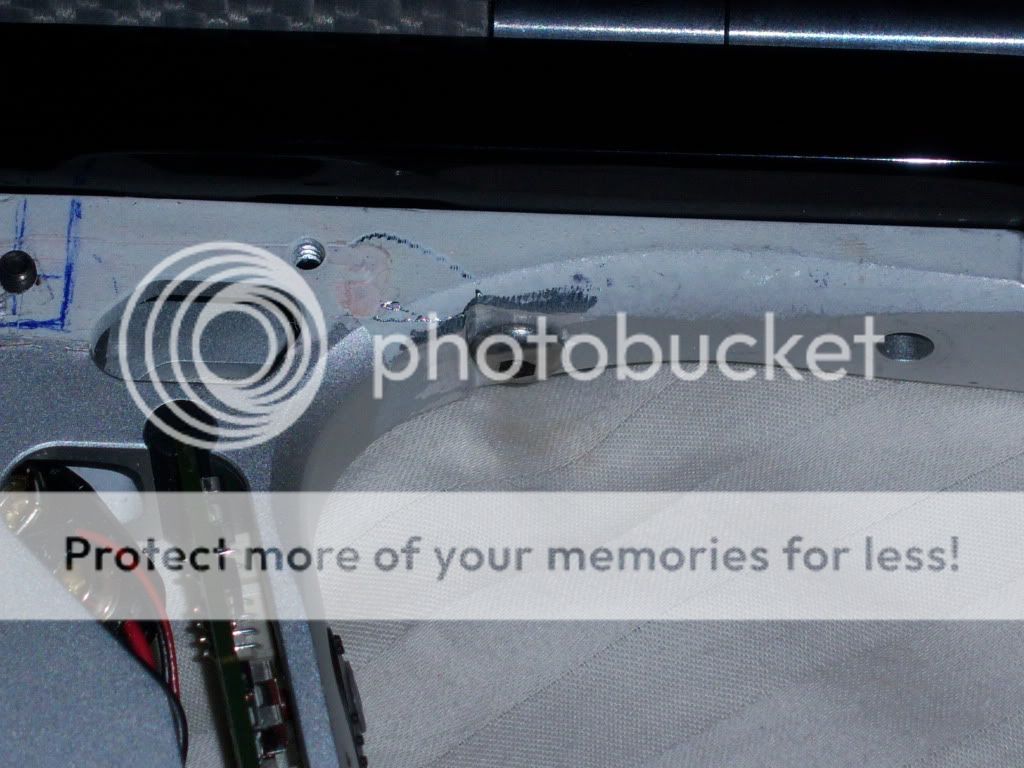
Next is locating the main valve screw

Then drill the hole and level the area where the main valve screw sets. Once this is done the marker should bolt together. The area around the main valve screw can be cleaned up later.

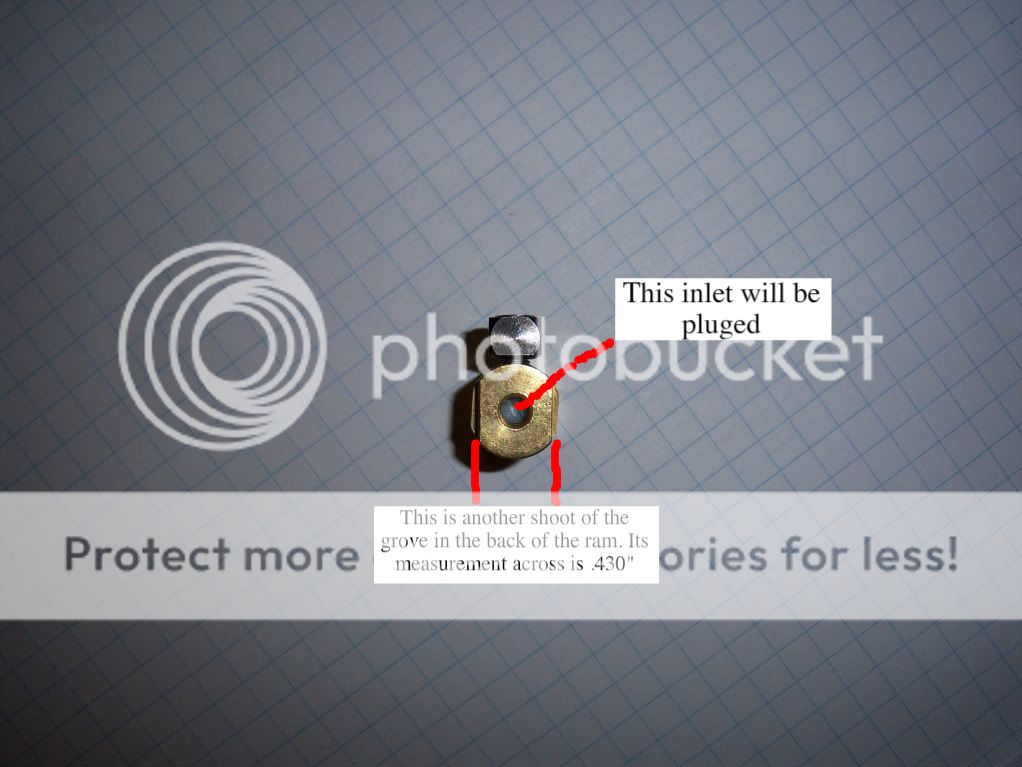
The Ram
It has been modified by loguzzzzzz in this manor so it will fit into the Planet Eclipse frames.(with a bit of help from a dremel)
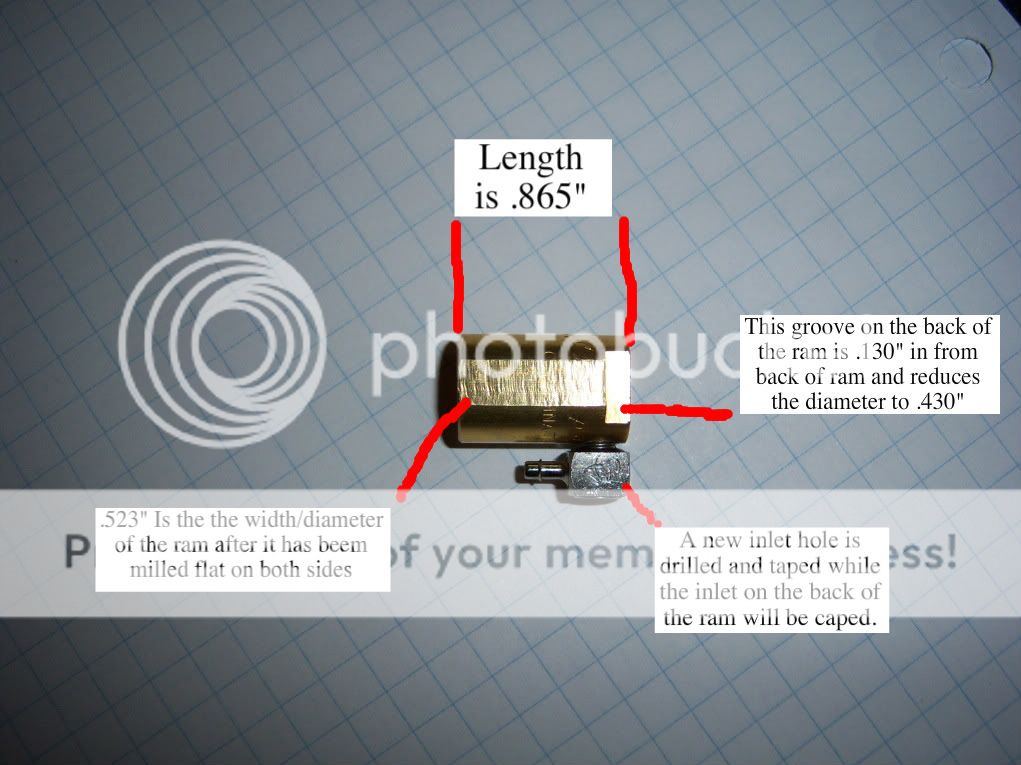
View from the back of the ram
The Noid
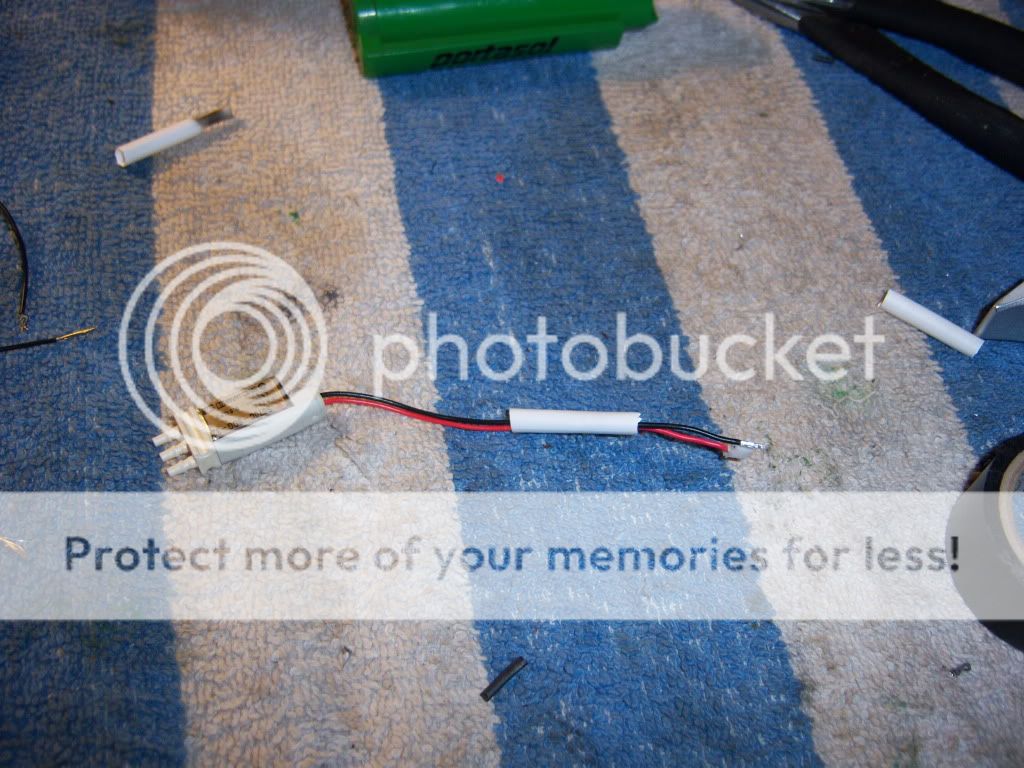
First you need to attach the noid wires to the plug from a etek noid. They are color coded.
Here is a video on how to do this And the soldering iron i use

Make sure you slip a piece of shrink tubing on before soldering the plug on
http://www.youtube.com/watch?v=OBJsI0rhoRs
Once soldered wrap a piece of e-tape around one wire, then the other, making sure that they will never toutch, Then slip the shrink tubing over the tape and shrink it

Here is the order for the ports on the noid. IMPORTANT: remember to wrap the noid with e-tape to insulate it from shorting something on the board.

Last edited by hill160881; 12-17-2010 at 03:16 PM.
-
Now lets put it in the frame conecting a small piece of line to the vent and a piece that reaches the ram. Note that the tubing going to the ram from the noid needs to be as short as possible and should not exceed 2.5"(that is how long mine is)

Once done put a battery in and make sure the noid works.
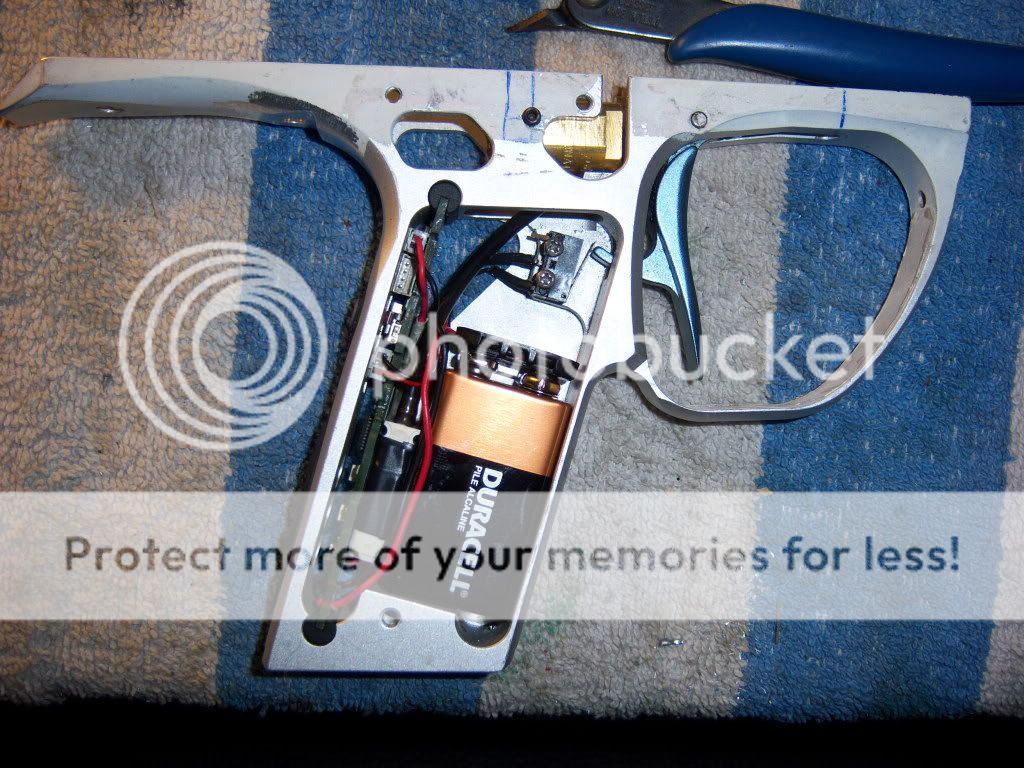
If you remove the sear rod correctly and gently you can reuse it if you want to go back to Mechanical

If you already have a lpr ready to go then bolt it on and go. Like this.
<iframe width="640" height="480" src="http://www.youtube.com/embed/jg-Aq-jujEs?rel=0" frameborder="0" allowfullscreen></iframe>
It is worth it to note that i made no adjustments after assembly. So if you follow these measurements then you will most likely be done
Here is this mod ripping
<iframe width="640" height="480" src="http://www.youtube.com/embed/ckVFmdhT1Ys?rel=0" frameborder="0" allowfullscreen></iframe>
<iframe width="640" height="480" src="http://www.youtube.com/embed/NOkwAeI1Jd4?rel=0" frameborder="0" allowfullscreen></iframe>
Last edited by hill160881; 01-21-2012 at 06:48 AM.
-
Just a side note on the LPR and the noid. If you get a shot when you air up the marker or when you degas it, then your LPR is not any good. Nor is another just like it.
This is caused by a temporary spike in the pressure that is intense enough to push past the noid and trip the sear. My bullet reg and some other very small reg from a pneu mag did this. This will Damage the noid. Over pressure is not good for any noid. I switched to a Palmer Pebble, and problem solved. Also the Pebble will handle 1500 psi input and is CO2 friendly. It is also faster than the micro rock that palmer makes, according to there website.
I also think this is why i can get this noid to cycle at such high rates of fire without damaging it. This is a theory, but it makes sense. If i am going to operate this noid at its max pressure then the LPR better not jump up 5psi, not ever. The LPRs i am using seem to be very accurate, and very very fast.
All my resources for building insane mags.
Fittings, valves, noids......
http://www.clippard.com/store/
Fittings, hose, orings......
http://www.palmer-pursuit.com/cart/
Orings and Quad-orings(x-oring)
http://www.theoringstore.com/
Lots of stuff, paintball and do it yourself
http://www.airsoldie...&Store_Code=AOS
Universal boards
http://www.scenariod...s.com/index.htm
Plugs of all types and any electronics related items
http://www.digikey.c...5887ecsdabplkst
Mag parts
https://www.automags.org/forums/forumdisplay.php?f=22
https://www.automags.org/forums/forumdisplay.php?f=11
Custom machining and other services.
http://www.lukescustoms.com/page0018.htm
Last edited by hill160881; 01-14-2012 at 11:23 AM.
-
Thats a nice how-to. Good Job
-
what screw did you end up using in place of the field strip thumb screw at the back of the frame?
-
Same as in the main body screw, only longer. There is a pic of it in the tread somewhere.
-
Well i decided to go with another Star frame with this build and now it is only waiting the for-grip from Venomous Designs. Note that i am using a rather different reg. No shots when i air it up or down so far.
Its test run/maiden voyage. I love these even with no eyes.
<iframe width="640" height="480" src="http://www.youtube.com/embed/-SjWlR33rvE?rel=0" frameborder="0" allowfullscreen></iframe>
Here are the filter settings I use to hit 25 bps
The filter is set at
clear 2ms
BIP 4ms
pull 4ms
release 4ms
dwell 13ms
Last edited by hill160881; 03-18-2012 at 11:17 PM.
-

have you considered building & selling the frames ?
-
Yes but i dont advertise and the last two did not last long when they went on the market. The last one lasted 10 min. Since i cant make a living at it and i enjoy making things i dont try to make a bunch of money. It is hard to sell something for like new prices when it is a modified part, no mater how good it looks. Especially when there is the VER frame and the other frames companies here on ao make brand new.
The starframes are pricey at $300 and up when modified, since they are nearly impossible to get without getting an entire marker. However the etek 2 frames are more affordable at 200 and up when modified.
-
I found the conectors for the noid to the etek/ego boards It is a ZHR-2, and the eye conector is a ZHR-4, 1.5mm
These are the part #'s for digikey
The inserts: 455-1130-1-ND
The two prong plug: 455-1366-ND
The four prong plug: 455-1202-ND
Be sure to get the right # of inserts for the plug. I would get several extras, of both inserts and plugs, as you may mess up a few in the attempt.
http://search.digikey.com/scripts/Dk...=zhr-2&x=0&y=0
Last edited by hill160881; 07-05-2011 at 06:40 PM.
-
Nice build. The black frame looks much cleaner.
I want to say that it is PTP that has a patent on pneumatic frames, which is why we haven't had many "how to"s in the past. I'm not dogging on you or anything, but offering to sell your wares may be violating patent law.
-
That may be true, but i doubt i take enough of the market to concern them.
New Information on the Pressure the noid should run at with a RT on off correctly modified. It is from 75 to 80 psi.
-
How to attach a new plug to the noid.
The insert.

This is how it will attach to the wire.

Once connected

We have been looking at what i will call the bottom of the insert, now lets look at the top of it. There is a barb sticking up close to the plug end on the top. It goes through a notch in the top of the plug. The picture shows it as best as i can. Does this Make any sense?

A video on how to install the plug insert into the plug. Hard to see but you will get the idea.
http://www.youtube.com/watch?v=3cHUmZ703ik
And when its done


Last edited by hill160881; 03-10-2011 at 10:49 PM.
-
Up for all the help this has provided me on my conversion. Thanks Hill
-
what size threads are the barbs for the ram? I want to put my inlet on like yours.
-
10/32 
-
Really? Thought it was smaller.
For the same size as the one In the back or for what you used?
10/32 is hugh
-
Well its not as hugh as I thought your right hill thanks!
-
-
What size hose did you use for the noid?
-
No gun

-
What is the required crimp tool is we want to do it without plyers? One that not too pricy :P
Can we use the stock wire with the board instead of using a extension? I have them long enoufh already
-
Don't know much about the Ego's.. Are those the same plugs used for the E-mag solenoid? If not, would you happen to know the part number?
-
Suceeded to instal the plug
After I get a longuer screw and ram hole for q.e.v I will only have tubing and fine tuning left
-
So I have installed the crimps on the solenoid wire...is there an easy way to tell which side of the plug the black and red wires are supposed to go into?
-
it doesn't matter either way will work
-
Thanks man...It's great to have such an old thread still be so helpful.
-
So I'm about finished and I'm having some problems getting the ram to trip the sear. I've cleared out plenty of room in the frame to give the ram ample room away from the sear and it struggles to trip the sear. Out of twenty trigger pulls I'd say it fires one time. I have an xvalve and an evalve with the same results. I also have a .712 and .750 pin and same results with both. Any ideas or advice? Thanks
-
Turn up the pressure a bit on the LPR.
 Posting Permissions
- You may not post new threads
- You may not post replies
- You may not post attachments
- You may not edit your posts
-
Forum Rules


 Reply With Quote


