
Well post up tomorrow.The suspense is killing me. You did a killer job on the wiring. It looks nice and clean.
-
-
This build reminds me when I purchased a 1977 chevy truck to fix up and my parents looked at me like if I was nuts when I lived with them. I have owned many cars over 20.
In your current situation its kinda of tricky and your on a border line of "you messed it up we messed it up case". You already went over the disaster they did with the cables so you touched that already, allowing them to say you could have messed something up, while rewiring. If you paid them to do the job I suggest you let them finish the whole job cause if you take any part they are giving you and put it in yourself they can clean their hands at the end and say well you messed it up while installing unless you want to allow that risk.
Either way I wish you the best with the project, just my 2 cents.Comment
-
Tropical life: very true but I documented the problem well before I messed with anything. You are probally right but I don't trust them to do as good a job as me at this point.
Kill-n-spree: as soon as I get the ECU I will give it a try. If it works I only need to relocate the fuel filter and go. The first thing I will do is get a video up. It will be next week before I can get the tachometer going as I need a diode or three and a resistor or two to run my tach dirrectly off of the coils, remember i have no distributor any longer. The diodes will be to keep the coils from cross communicating.
So next post will be success or failure.Fire power my friends.Comment
-
I don't have a tach so I don't really push it but you get the idea.
<iframe width="853" height="480" src="http://www.youtube.com/embed/SUPhTINSGuI?rel=0" frameborder="0" allowfullscreen></iframe>Fire power my friends.Comment
-
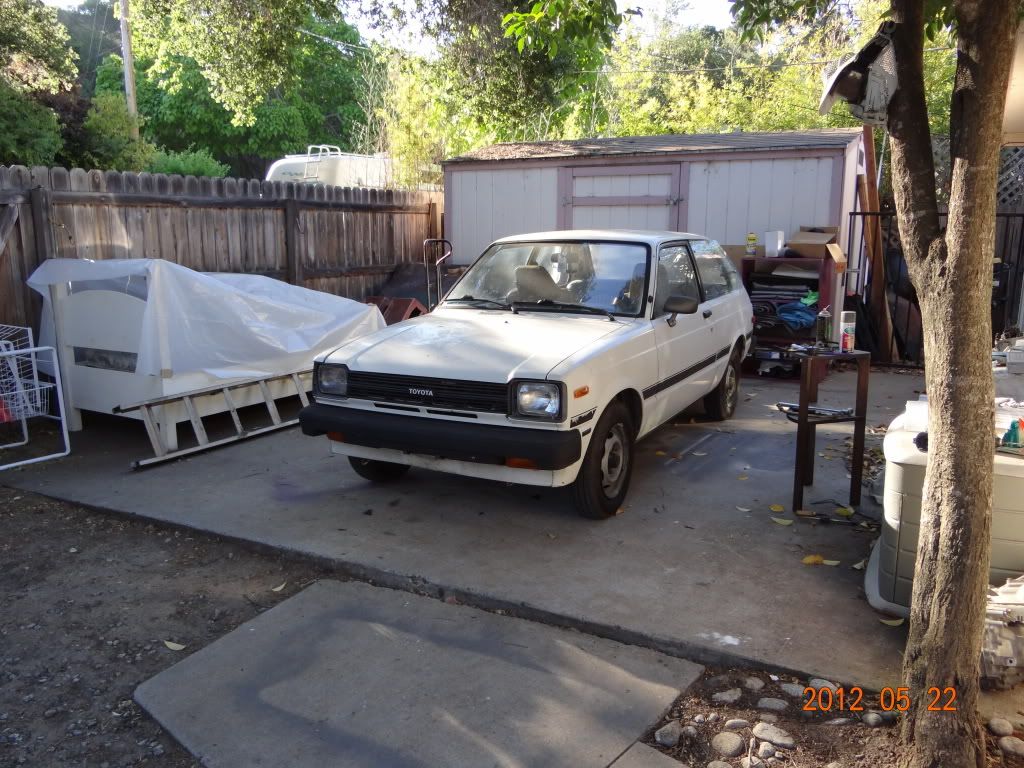
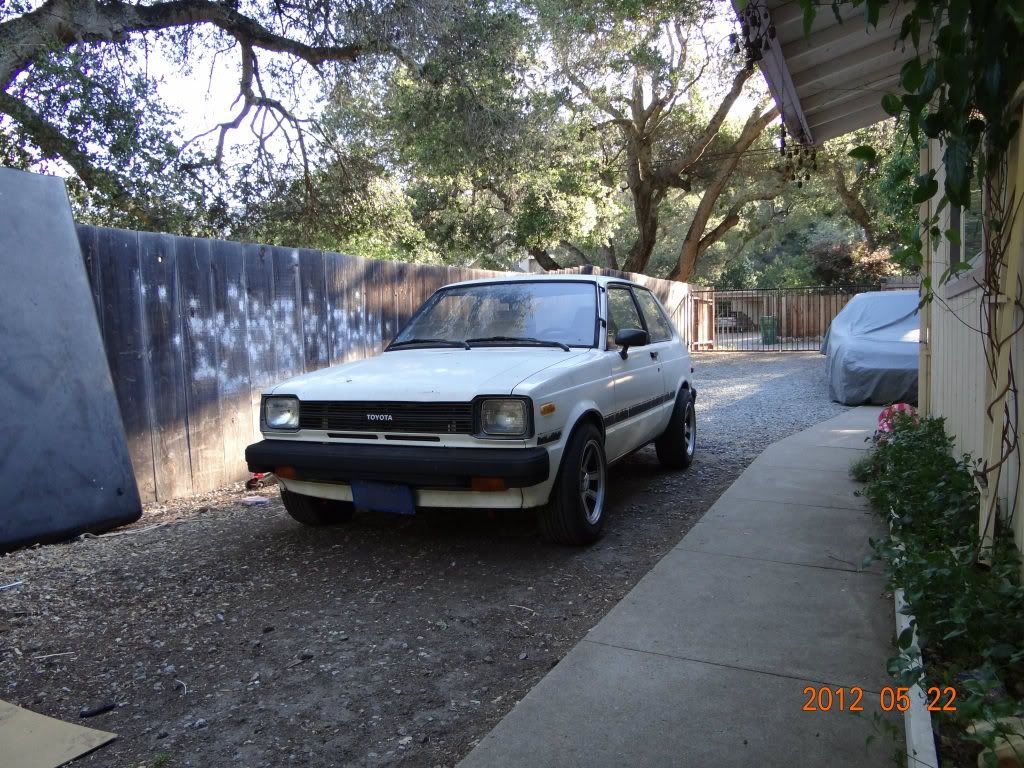
These are the pics of the finished stance. Before and after
Before

After
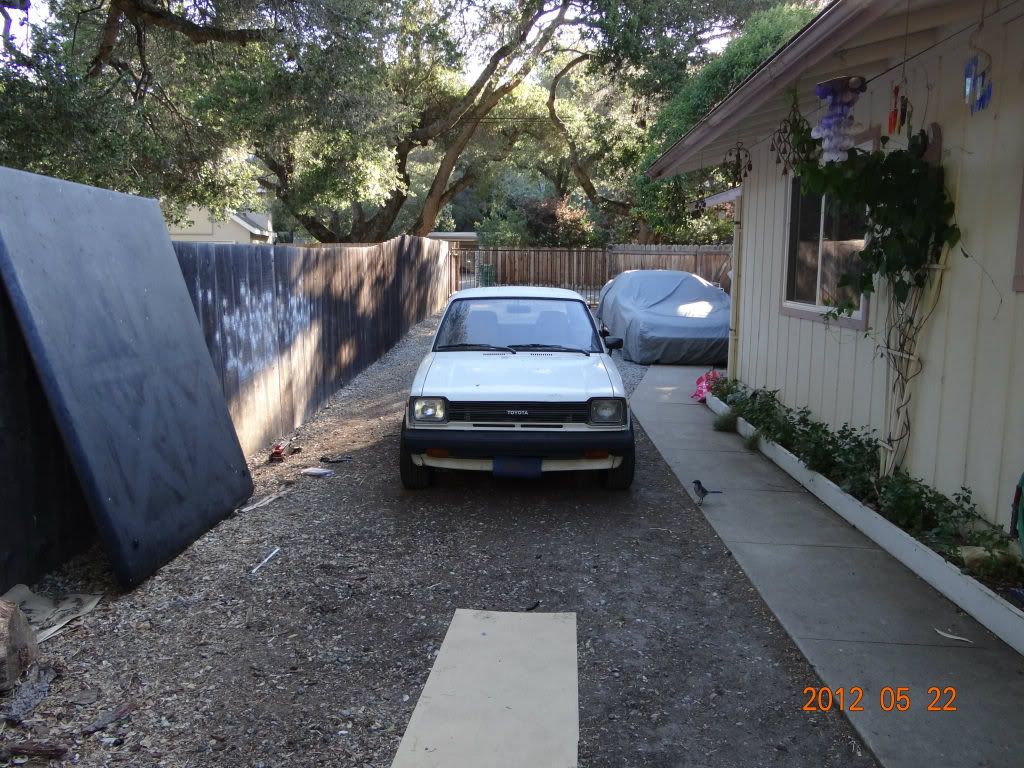
Before
After
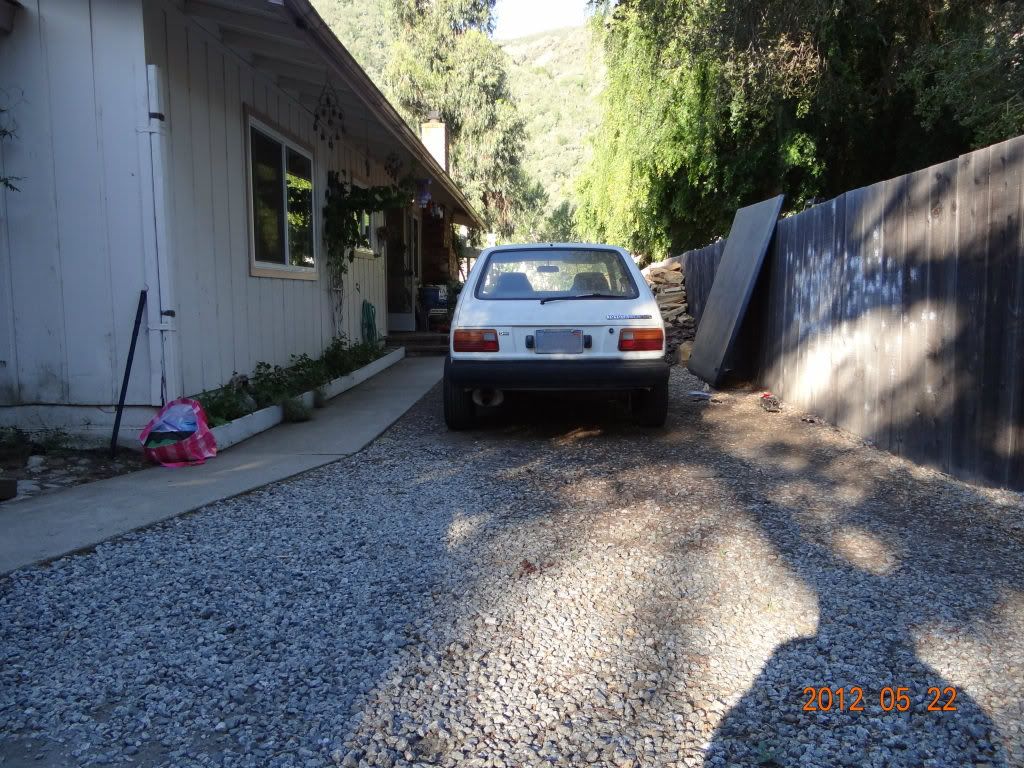
A shot of the rear. Pretty mean stance.
As I have a thing for the sleeper I think I pulled it off pretty good. Would you guess it's a race car? Muahaha. And still only at 10'psi. I will need to replace the stock BOV with one capable of more pressure to get the last 4 psi or so.Last edited by hill160881; 05-22-2012, 11:23 AM.Fire power my friends.Comment
-
I can finally answer this the way I want.Originally posted by kill-n-spree
Open road milage at 70 mph was 30 mpg over a 120 mile range from Oakland to monterey. So a milage of 23 in town and 30 on the road. Right where I was hoping!!!!!!!!!!! Eat crap V8s
Well I got it back, for hopefully what will be the last time, And things look better. The only thing on my list not finished up was the rear brakes due to a bad caliper. But now we know what it is I can fix it with a simple replacement of the rear driver's side caliper, which is already on order and will arrive monday.
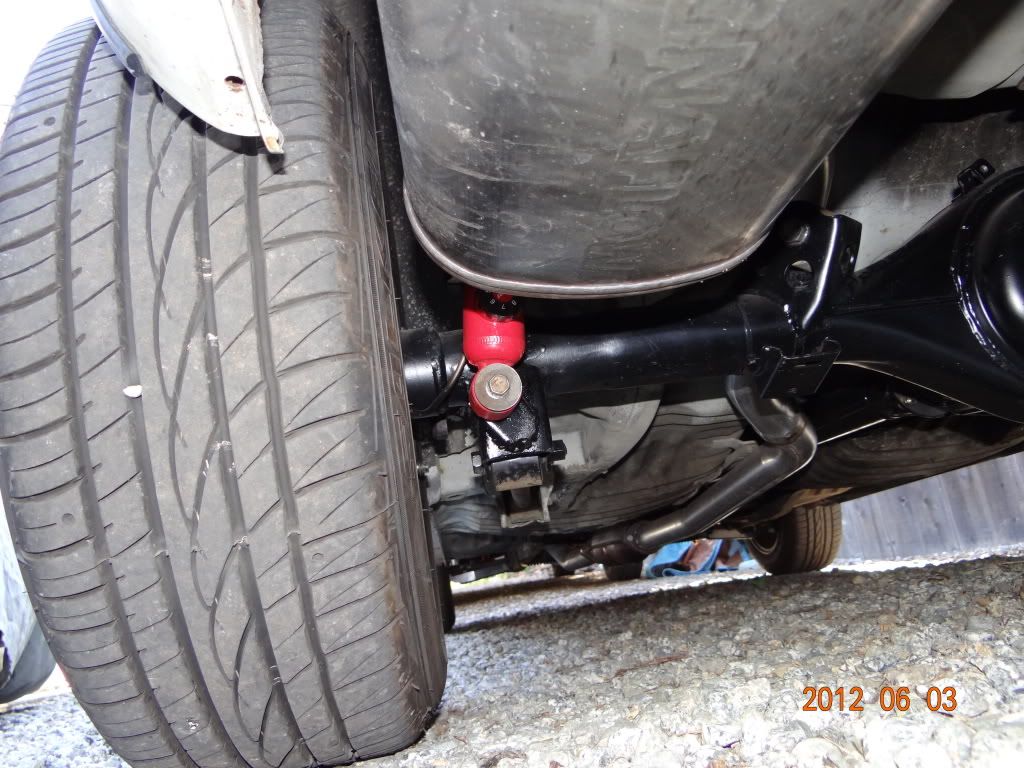
They relocated the mounts for the rear shocks up 3" to take some load off the springs and allowed it to ride WAYYYYYYY nicer. It now rides as nice as I was originally was hoping for. It is still a bit jumpy on the interchanges at overpasses but that is probably due to the wheel base being only 92".
Here is the new location of the shock mounts

The caster is set at 2 degrees but I want 3+. Unfortunately the fenders wont allow more than 2 at the moment, without the front edge getting cut out.. It starts to float at around 100 mph so more caster is necessary at some point, if I want it to come into a turn at high speeds and not walk. The camber is set at -.5 degrees and the car tracks and is no longer harry to drive and keep strait on the highway. Now I can relax and drive as the car feels well planted.
With the major kinks worked out it rides and drives fantastic considering its capabilities on and off the pavement. I plan to road trip it home to Oklahoma for a visit late this summer in Nov. if everything looks good and is functioning properly by then.
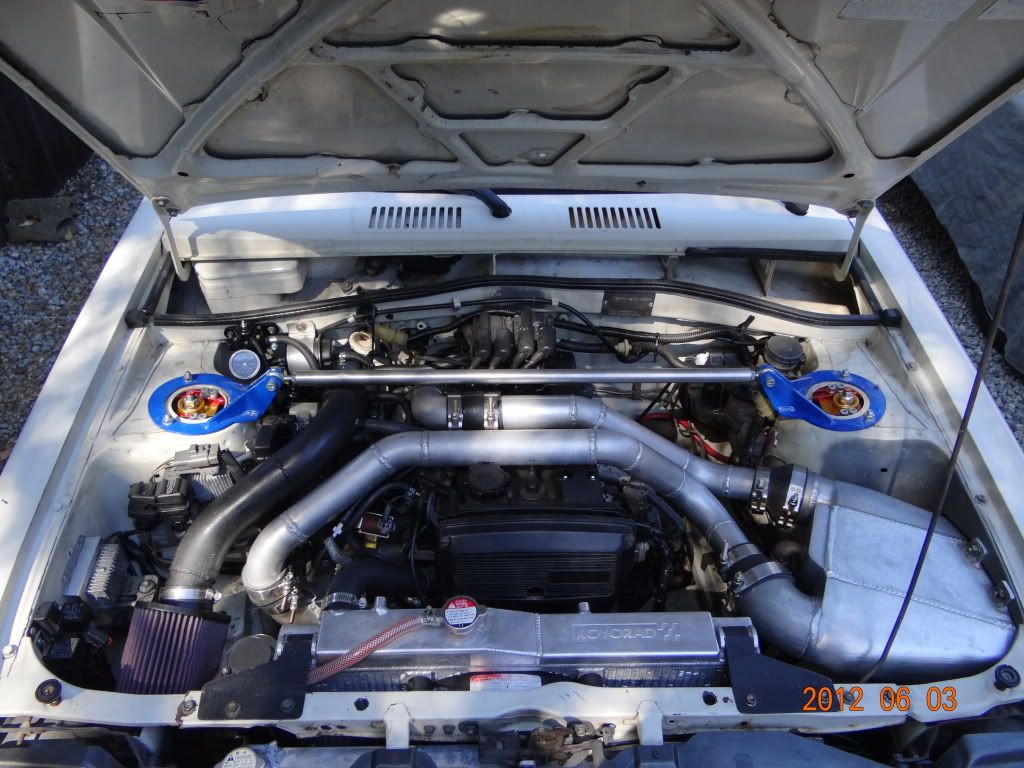
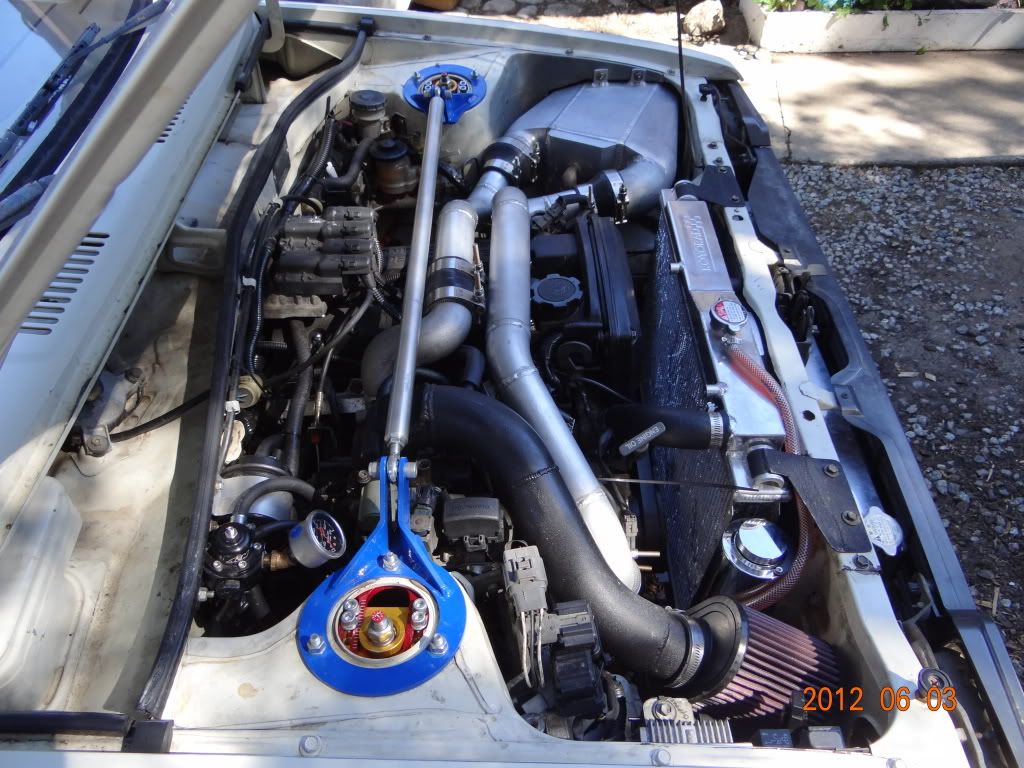
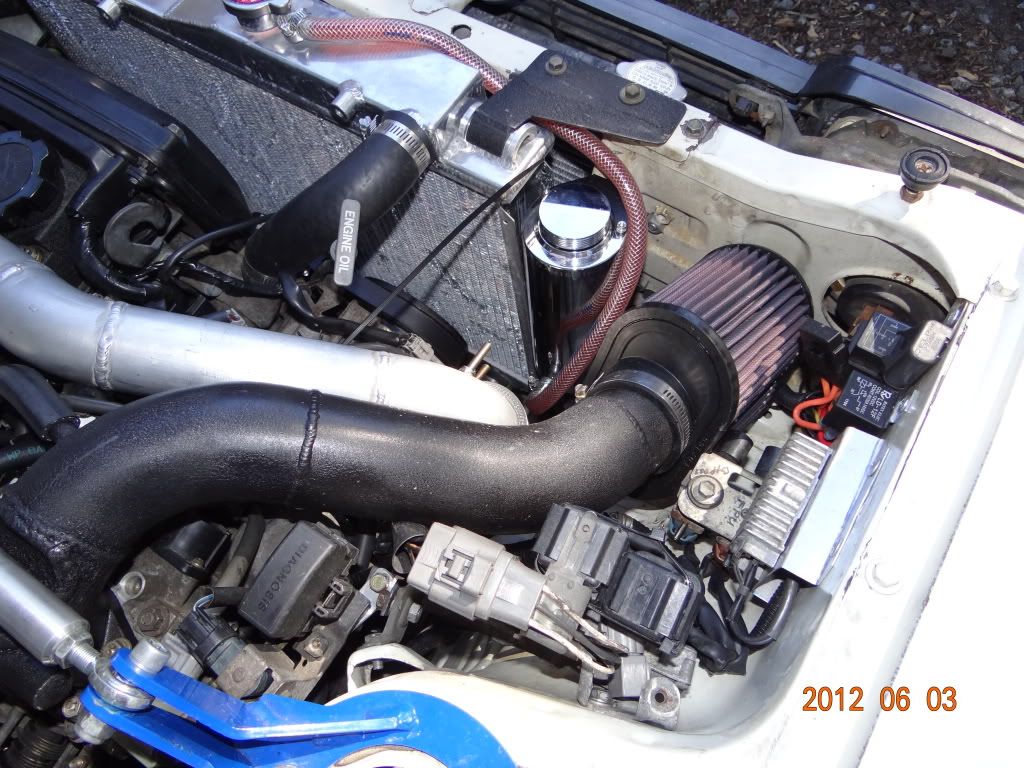
More pics of the finished engine bay.

Now I move onto phase two, the the interior and the audio
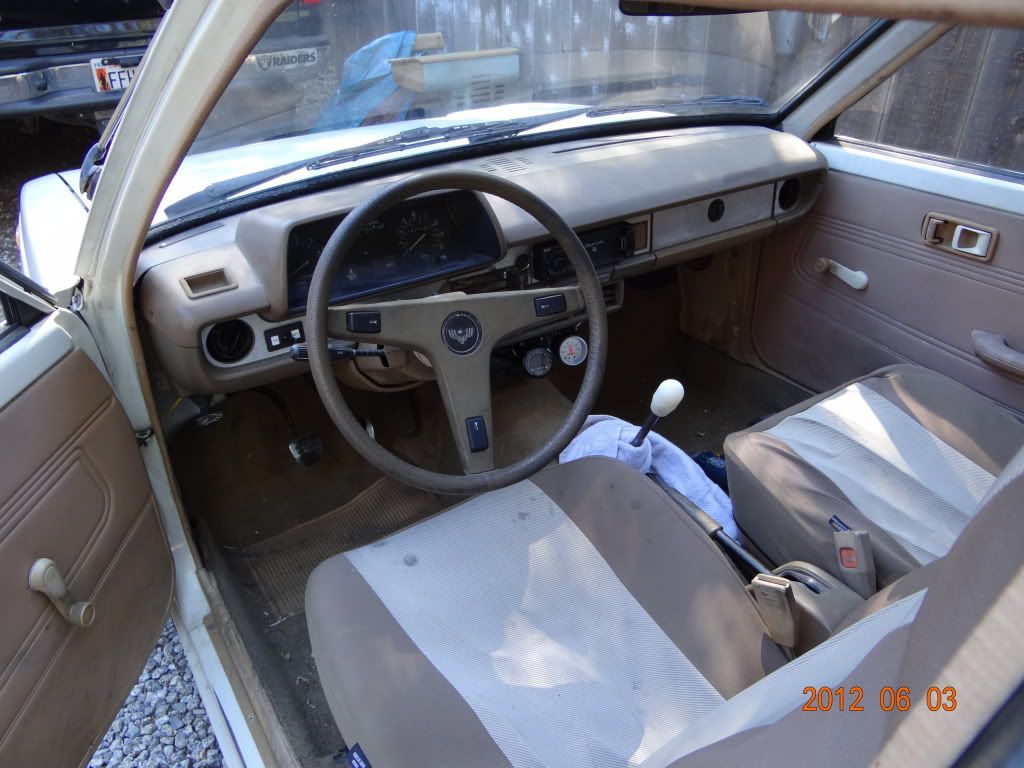
A shot before I totally rip it all apart and make it a smooth light grey.
 Fire power my friends.
Comment
-
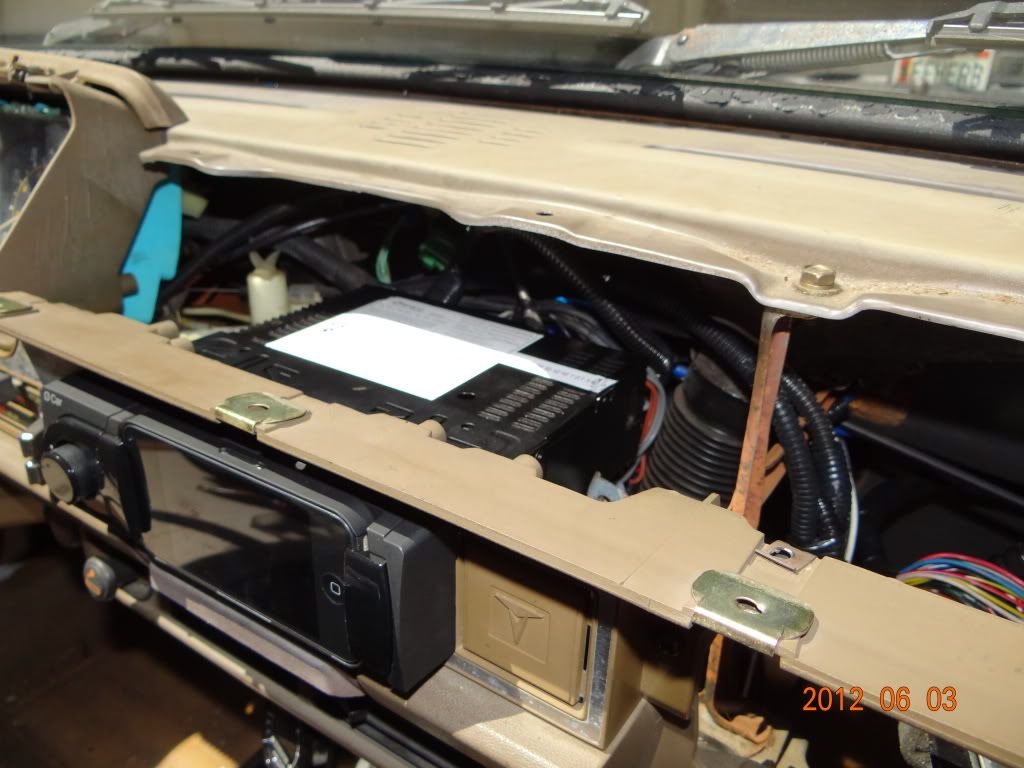
Now for the install of the head unit.
The harness with all RCAs, power, video, and hands free wires included
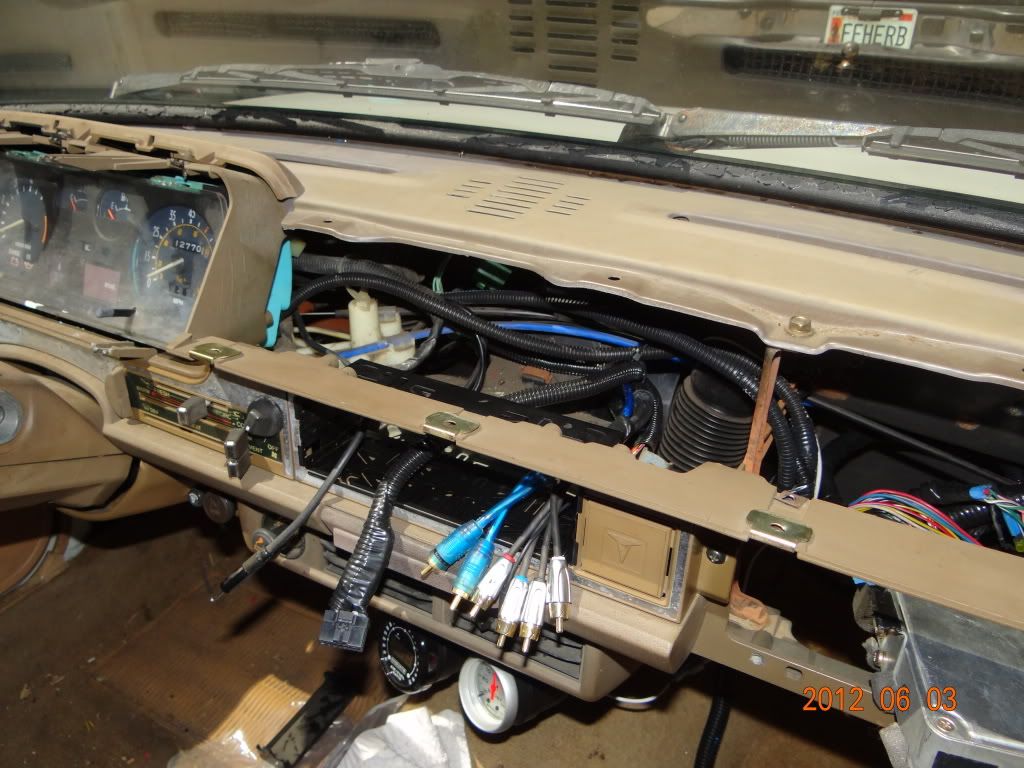
Under the dash. I feel really comfortable with audio work, it is almost meditative. lol
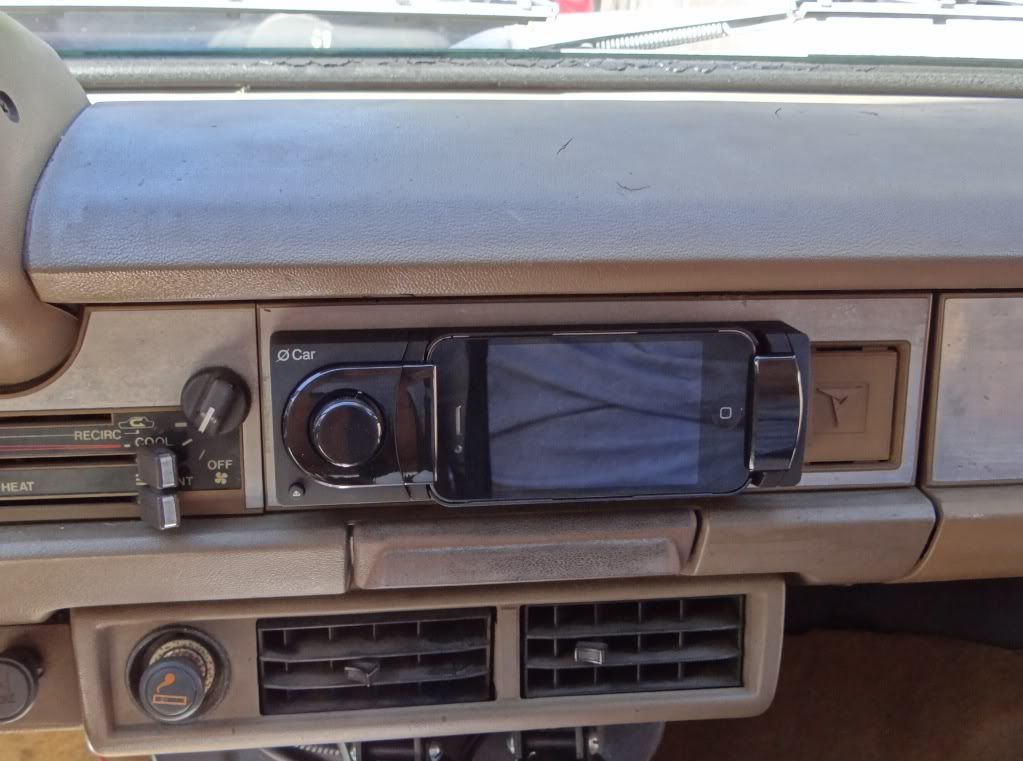
The finished look. Not as clean as some thiner faced units but I like the ability to use my Iphone as my head unit with all its features.... Video, phone, music, internet, GPS guide............................ all at my fingertips mounted on the dash.
Next for the hard part,,,,,,,installing the interior and all 13 speakers. what was I thinking.
  haha.
haha.
I am sacrificing a bit of sound quality for functionality and a clean look without a mess of **** all over my dash and mounted to the tunnel. With the gauges and the bass knob it is already getting cluttered. It will be hard to keep it looking clean and not totally over the top with 13 speakers. haha. Now I dont need a phone holder or a hands free that mounts separately and then connects to the radio like all others do. Also when listening to music i can use the iphone itself to switch between songs and playlist. Also my passenger can watch anything on the phones movie/tv show list and have the audio through the main speakers. I also have an unlimited data plan and youtube/video streaming works perfectly anywhere a 3G signal is at 3 bars. That is why I went with this head unit over a cheaper one with better sound quality. Besides I compensate for poor sound quality by having lots of it. haha
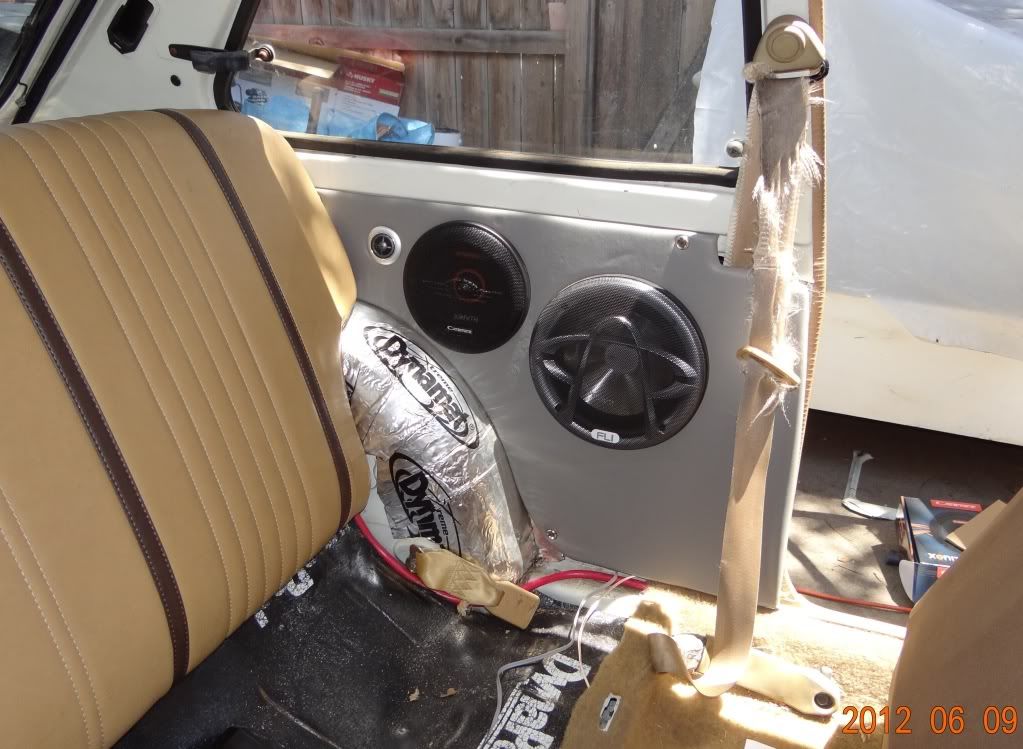
seeing if it will all fit????? Yep no problem. A battery, two amps, one 2.5 phrad capacitor, and one 8" dub7. Once some finishing pannels are done all you will see is the sub. All else will be hidden under the finishing panels. The finishing panels will be covered the same way as the rest of the padded vinyl interior.
 Fire power my friends.
Comment
-
looking good. Thanks for the update.Comment
-
Killer choice on the head unit, you sacrificed nothing hill... it'll sound amazing
Comment
-
Thanks!
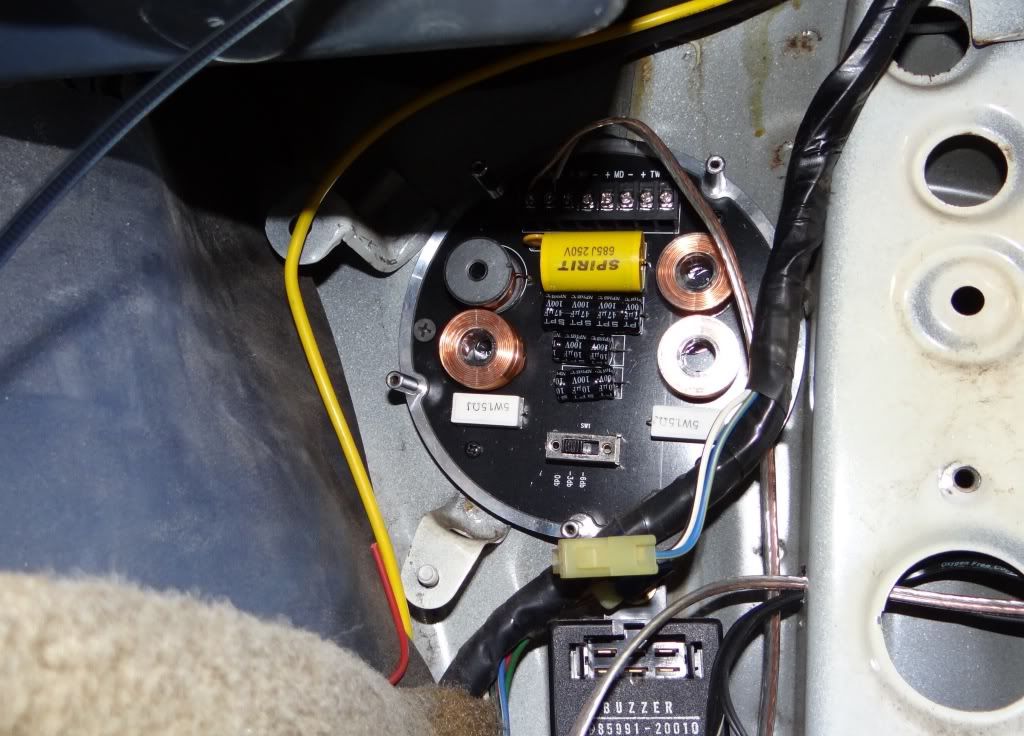
An update.
This is a three way cross over mounted where the old speaker was in the kick area.
Got a door finished!!!! Looks really nice.
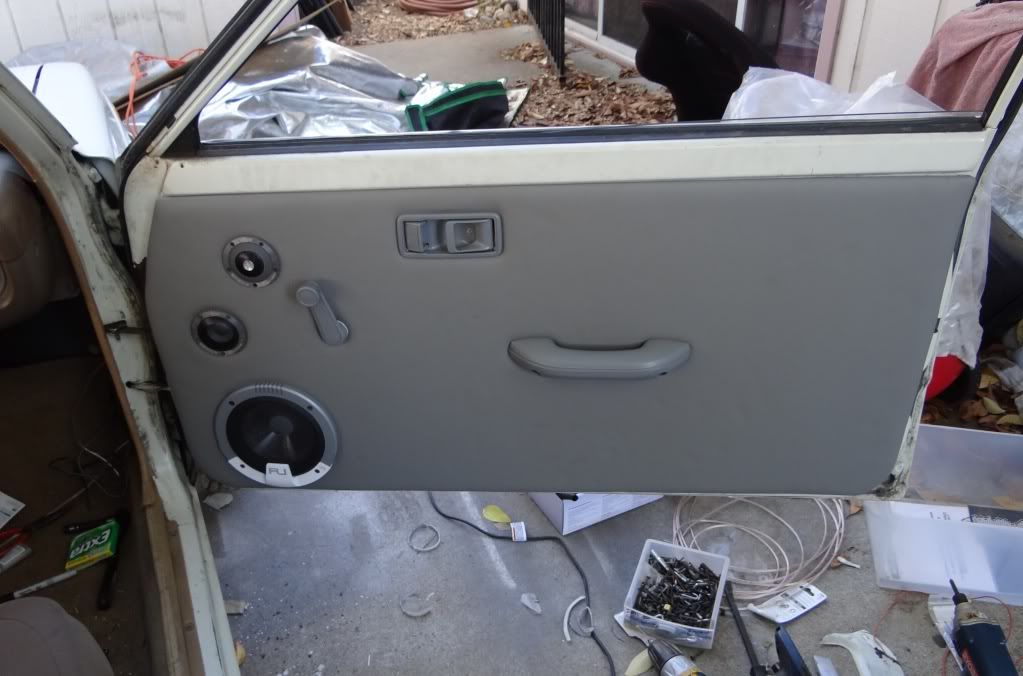 Fire power my friends.
Comment
-
What kind of spray paint are you using on the plastics? How durable is it? Have you used it for any length in the past?Comment
-
spyhunter
will this have button on the steering wheel to deploy smoke,oil and shoot paintballs at anyone that is in the way?
Comment
-
I used a plastic primer and a satin grey rustoleum on my brothers car. I have done this in the past and it will hold up for years on plastic that sees minimal to no flexing. For this method dont use gloss, only use satin, eggshell, or flat.Originally posted by kill-n-spree
On my car I am trying a different product as the color I was using from rustoleum was discontinued, so I am using a vinyl, fabric, and trim paint from duplicolor. It looks like it is what I want but time will tell. It even painted my brothers back seat and looks like it was recovered. we have sat items in the seat and had people in it and no pealing or cracking.
It kinda sucks as not even a professional shop has a solution to unavailable interior plastic components. If I could get new ones I would but it is not possible.Fire power my friends.Comment
-
Well it is loud, haha very loud! It has enough base to make your vision go blurry. lol. Then it will make you squint from the vocals. It is not as clean as some other setups I have done but plenty good enough with no distortion.
The other door is done as is the rear panels. Remember I have new carpet and seats and this is just a ruff install and wont look finished until it is all done.
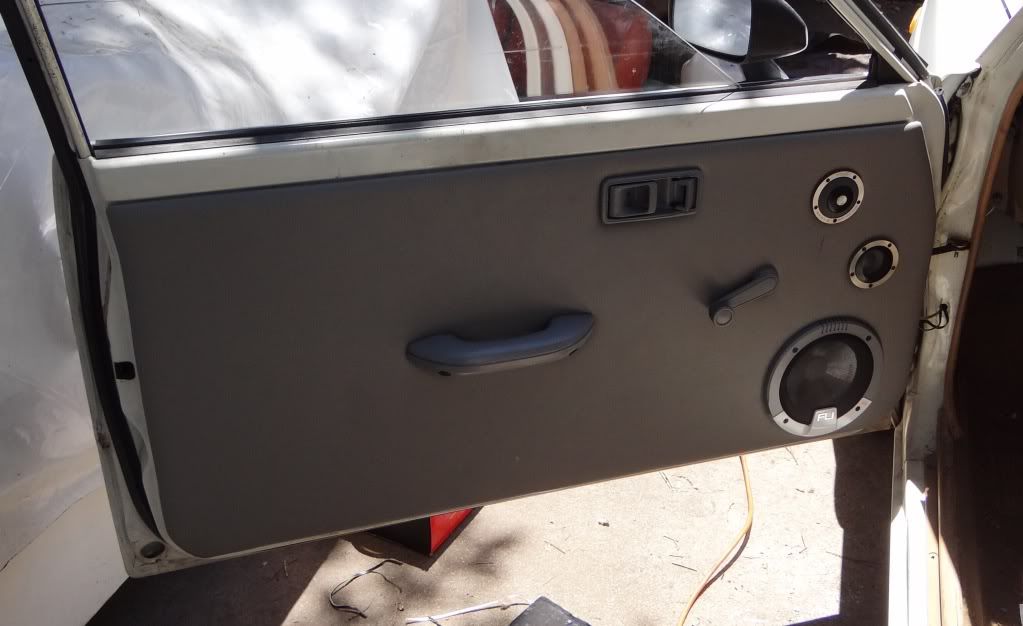
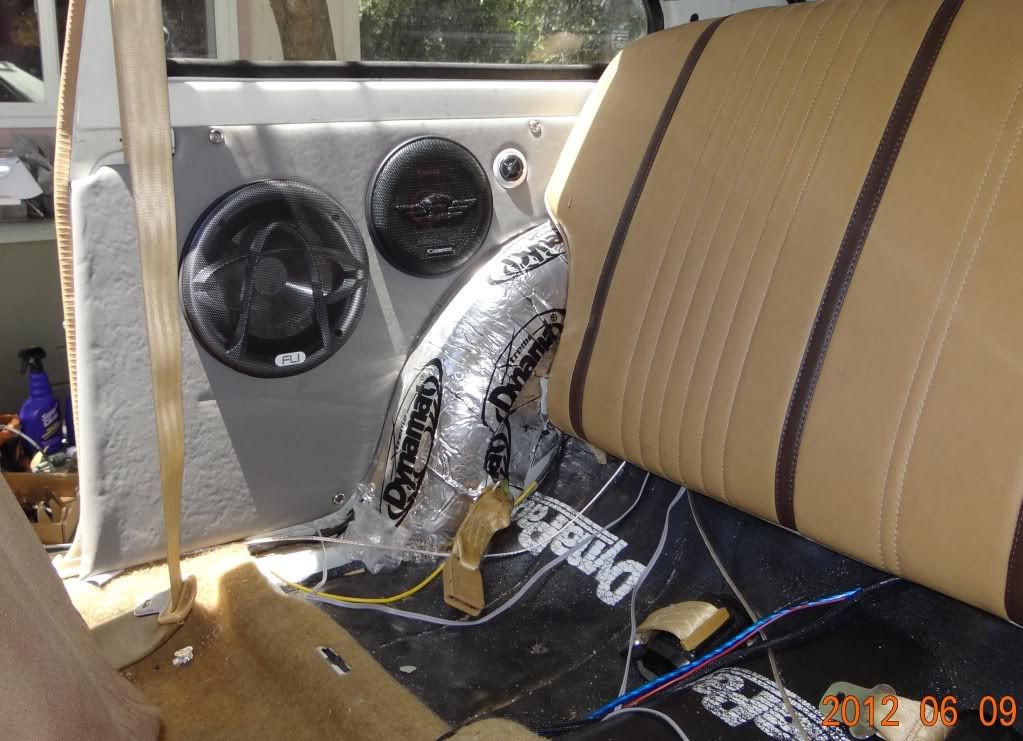 Fire power my friends.
Comment
-
I'm enjoying watching this Hill! You are amazing. I wish I had half your ambition.
Comment


Comment